


VOODOO DOLL

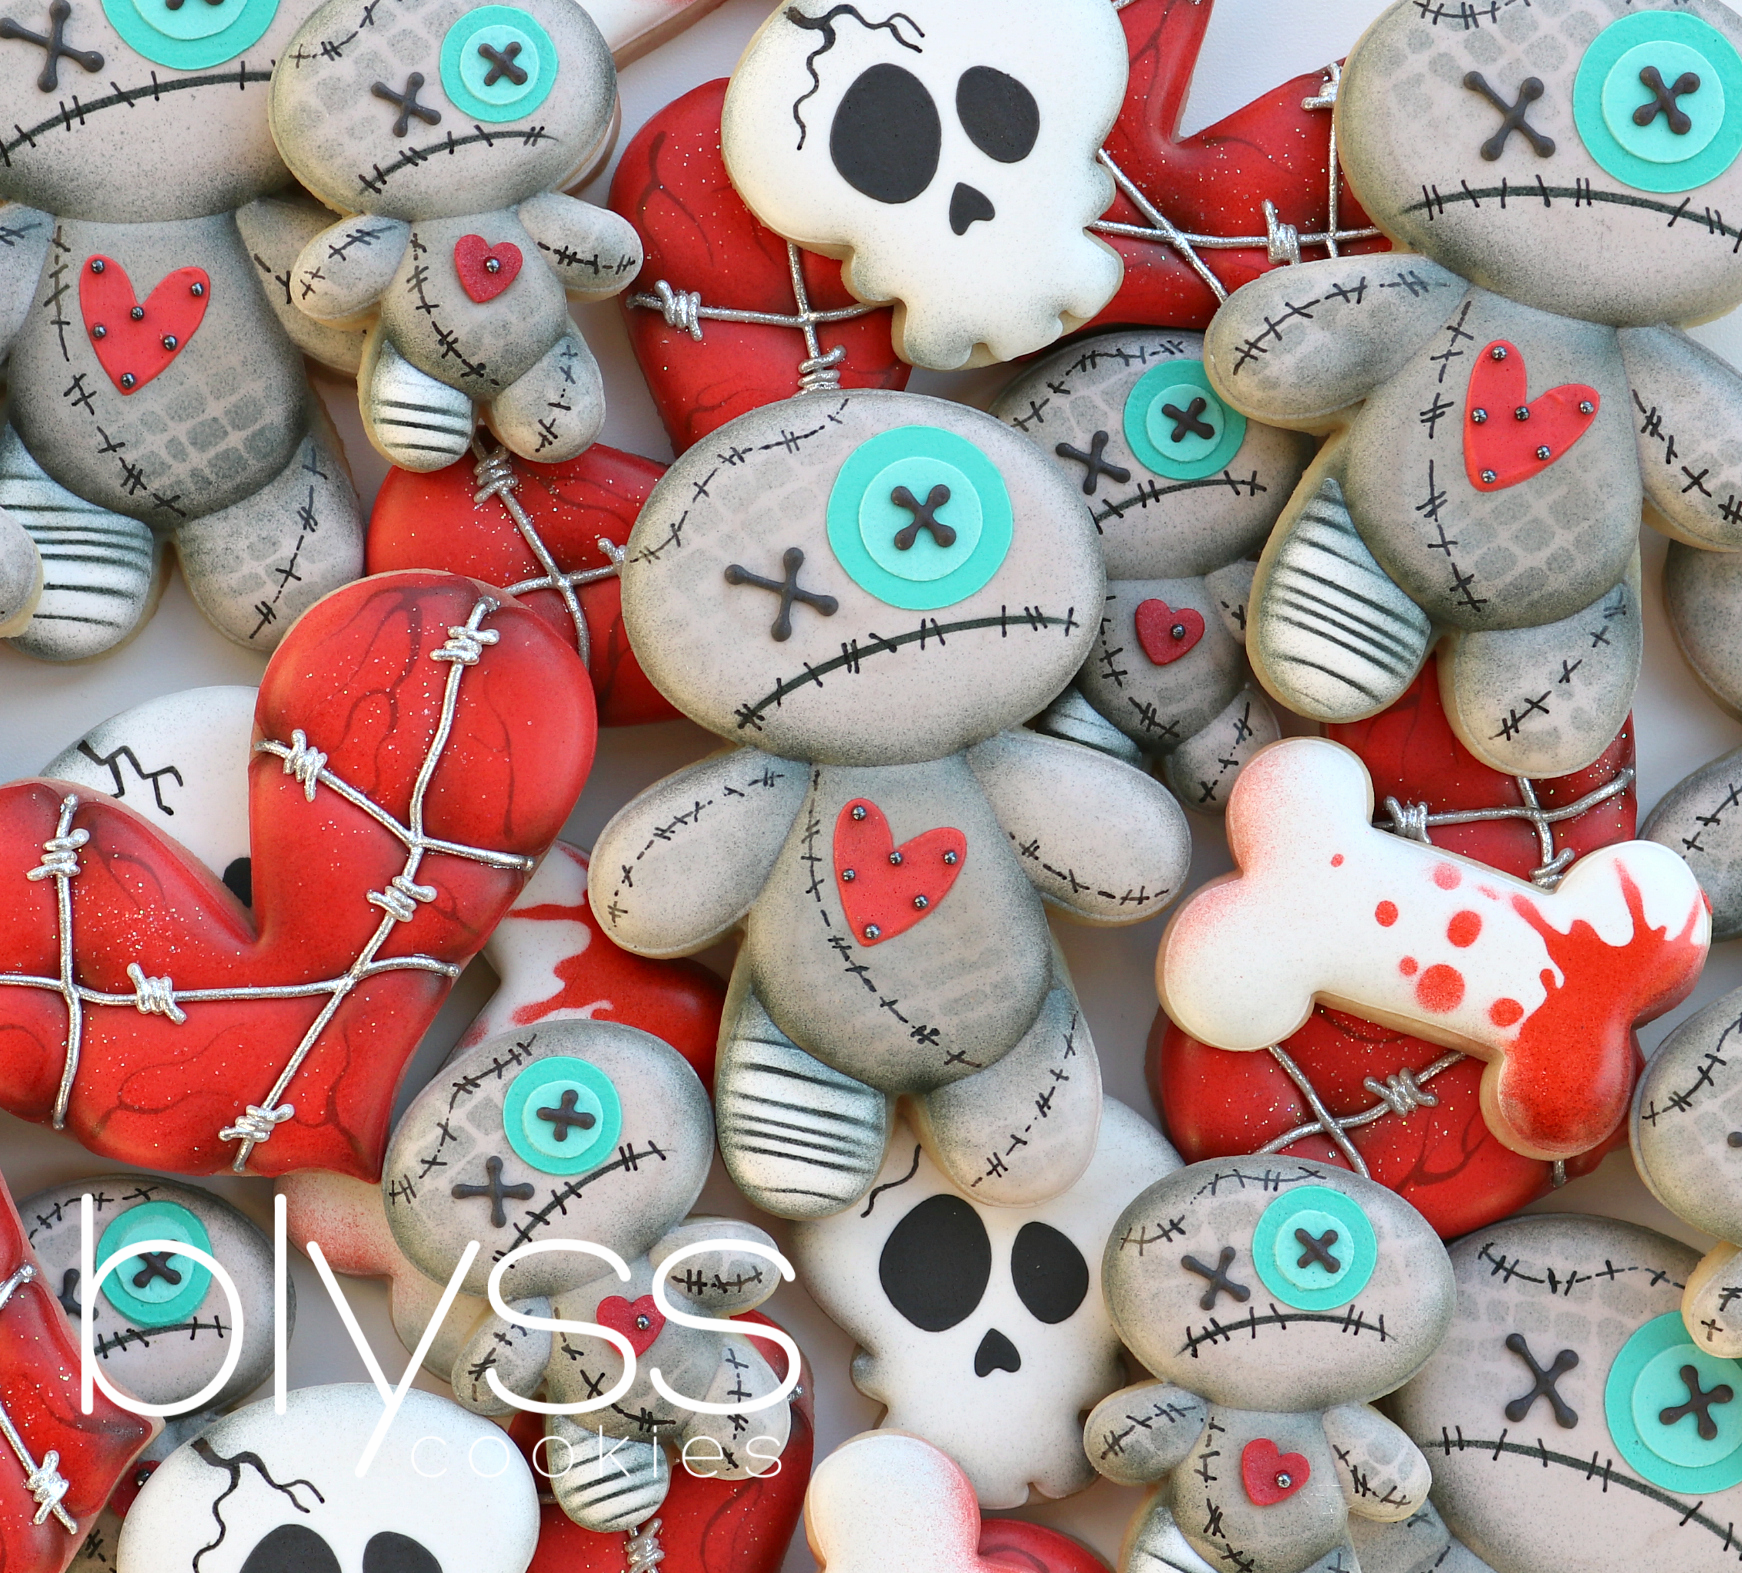
These cute little voodoo dolls are sure to put a spell on you! With a little black magic and an airbrush, you can create all sorts of wicked things! We’ve included some great tricks in this tutorial to help you make the cutest treats for Halloween!
This voodoo cookie set is actually from last year. We made a tutorial for the “tortured hearts” and when we posted it, people went crazy for the little voodoo doll. Many people didn’t believe they were looking at a cookie because the shading makes him look very 3D.
That little trick comes from the airbrush, friends. We may have mentioned this before - but for those of you that are new around here - the airbrush is our FAVORITE decorating tool. It’s a quick, “no-touch” way to create dimension, texture, patterns and add shine to your cookie designs - and people notice the shine! That’s why the “no-touch” is kind of a big deal.
If you’ve worked with royal icing at all, you’ve probably learned (maybe the hard way) that it does NOT like water or moisture. It can be difficult to “paint” on color or shade using food color and a brush. If it isn’t done just right, it will break down the smooth shiny surface of the icing.
We’re also happy to introduce a new stencil to our line up! We designed a voodoo stencil to help you with all of the details on this little guy - so HAPPY HAUNTING!
Icing Colors
light taupe piping and flood
white piping and flood
dark turquoise piping
light turquoise piping
black piping
red piping
YOU CAN FIND OUR FAVORITE AIRBRUSH COLORS HERE


Supplies
gingerbread man cutter (we used Sweet Sugarbelle’s)
black airbrush color - this is our “black magic”!
Cake Katana or tweezers
booboo stick or scribe tool
2 Notta Cookies (for scraping stenciled details)
Once your cookies are baked and cooled, you’re ready to decorate!

Step 1
Using a 1.5 PME tip and your taupe piping icing, outline his head first and then his body.
STEP 2
Using your taupe flood, fill in his body. Allow to dry for about 10 minutes in front of a heater fan or for 30 minutes if you’re air drying.
STEP 3
Still using your taupe flood, fill in his head. Use your taupe piping to outline his arms and his LEFT LEG ONLY! Allow to dry for another 10 minutes in front of a heater fan or 30 minutes if you’re air drying.
STEP 4
Using your taupe flood, fill in his arms and his LEFT LEG ONLY. Allow to dry until 20 minutes in front of a heater fan or 45 minutes if air drying.

STEP 5
Place your burlap stencil in your stencil snap and carefully position it over your voodoo doll. We think it looks best with the stencil pattern aligned diagonally. Load your airbrush with your black airbrush color and VERY LIGHTLY spray small areas of the stencil. We didn’t want his whole body to be heavily patterned. We wanted the stencil design to add some subtle texture here and there creating the look of burlap fabric. Each cookie will end up looking a little different.

STEP 6
When you’re done airbrushing, carefully lift off your stencil snap and this is what your voodoo doll will look like after he is stenciled.
STEP 7
Use more of your black airbrush color to shade around the different sections of his body. Try to make the darkest areas where his arms and leg attach to his body and under his chin.
STEP 8
Use your white piping to outline his RIGHT LEG ONLY
STEP 9
Use your white flood to fill in his RIGHT LEG ONLY. Allow to dry for 10 minutes in front of a heater fan or 30 minutes if air drying.

STEP 10
Place your mini threads stencil in your stencil snap and align the stripes across the voodoo doll’s white (RIGHT) leg. Use your black airbrush color to spray ONLY over the white (RIGHT) leg. Be careful as you’re spraying so you don’t leave stripes anywhere else on his body.

STEP 11
When you’re done airbrushing, carefully remove your stencil. This is what his right leg should look like after it is stenciled. Use your black airbrush color to shade around the edges of the white (RIGHT) leg. Make the darkest areas where the leg attaches to his body.
For the rest of this tutorial, we will be using our new voodoo doll stencil. It’s a 3 piece stencil set. One piece is used to create the button eye, mouth and heart details for the large version of this voodoo doll. The second piece of the stencil is identical but smaller scale and is meant to create a mini version of this voodoo doll. The third piece of the stencil can be used to airbrush stitching on either size voodoo doll if you don’t want to freehand those details with a food writer pen. If you want to create some of the other supporting cookies we made in our voodoo set, the third piece of the stencil also has a skeleton face sized perfectly for the skull in Sweet Sugarbelle’s Autumn Mini Cutter Set. It can be airbrushed OR scraped!
STEP 12
Use the LARGE version of the voodoo stencil and place it in your stencil snap. Align it so the large mouth is positioned (frowning down) over the lower third of his face. We think it looks best positioned a little at an angle. Check to make sure you’re leaving enough room for the large button eye we will add later above the mouth. If you’re worried about being able to eyeball it on each cookie, STOP here and use this trick to help you!
TIP - Use the large voodoo stencil and position the LARGEST circle over the left side of his face where you want his eye to be. Lightly trace the circle with your food writer marker on the cookie. Now, when you go back to step 12 and reposition the stencil to airbrush his mouth, you can clearly see how much room to leave for the eye we will be adding in the next step.
STEP 13
Make sure you wash AND DRY your voodoo stencil after airbrushing the mouth so you’re starting this step with a clean stencil. If you used the trick and traced the large circle for the button eye, realign the stencil over your tracing. If you eyeballed it like we did, position the stencil so the large circle fits above his mouth on the left side of his face. Make sure the entire circle cut-out is completely up on the top (flat) surface of the cookie or you wont get a clean scrape. Use your dark turquoise piping icing and scrape the large circle for the base layer of the button eye. Allow this icing to dry for 10 minutes before moving on.
If you need help scraping stencils, you can see how we do it here!

STEP 14
Using the same stencil, align the smaller circle cut-out so it is centered over the dark turquoise circle you scraped in step 13. Use the same technique to scrap the smaller circle in the light turquoise piping icing.

STEP 15
Using the same stencil, align the heart cut-out over the voodoo doll’s chest. Use the same technique to scrape the heart with your red piping icing. After you lift the stencil off and while your scraped icing is still wet, use your Cake Kantana or tweezers to add the small black metallic nonpareils to the heart.
STEP 16
Use your black piping icing to create the “X” details over the center of both eyes.
STEP 17
Use your food writer marker (or the third piece of our voodoo stencil) to create the stitching on your voodoo doll.
We’d love to see the Wicked VOODOO creations YOU create!
Still need more?
You can find the rest of the cutters we used to make this set from Sweet Sugarbelle and American Crafts.
Sweet Sugarbelle Mini Shape Shifter Set 1
Bone
Mini Voodoo Doll
Skull
Large Heart - from KaleidaCuts. See the tutorial for our Tortured Hearts HERE

