


PEGASUS WINGS

Learning the designing aspect of decorating cookies is an ongoing and ever growing art. It was probably the thing we struggled with the most in the beginning. Now, it’s one of the things we enjoy most about cookie decorating. There are so many fun things to consider - color pallets, cookie cutter shapes, details, sprinkles and possibly most important - the execution of the design. Experimenting with designs can be scary. However, we can honestly say some of our favorite things wouldn’t be in our cookie kitchen today if we hadn’t taken a risk - like our airbrushes for example! With all of the different tools and options out there, a cookie decorator could easily execute the same idea in 10 different ways. These wings are a great example of that - and when you can’t decide on just one, why not try them all?
We know you’ve seen these wings before. We’ve done them as Christmas angel wings and also as Cupid’s wings for Valentine’s Day. This time, we’re turning them into Pegasus wings because who doesn’t love rainbows, unicorns and magical things? One thing we’ve learned from raising little girls… making anything “rainbow color” makes it that much better! We can’t really argue, this version of our wings is not only fun and colorful but it’s also SO EASY! It almost seems silly to even make a tutorial because the steps are so simple. - BUT, don’t laugh. Some of us live for designs with one frosting color and 3 steps!
Icing Colors
white piping and flood
Yes, really, that’s it - but remember to actually color your white frosting white. It helps prevent color bleed AND makes your frosting a brilliant white.
YOU CAN FIND OUR FAVORITE AIRBRUSH COLORS HERE
Supplies
Blyss angel wing CUTTER
Blyss angel wing STENCIL
white wafer paper SHEETS
Flower craft PUNCH
tweezers - for attaching your flowers
edible glue needle tip applicator BOTTLE (filled with corn syrup or EDIBLE glue)
1.5 PME tip - for outlining your cookies
Airbrush colors - Chefmaster Neon Color SET
Neon brite blue
Neon brite purple
Neon brite pink
Neon brite orange
Neon brite yellow
Neon brite green
Metallic PEARL
CAKE KATANA - for attaching your sprinkles
Sprinkles for flower centers. HERE are the ones we used
BLYSS ANGEL WINGS CUTTER AND COORDINATING STENCIL
Needle tip applicator bottle
Once your cookies are baked and cooled,
you’re ready to decorate!

STEP 1
Start by outlining your cookies with your white piping and fill them in with your white flood. You can let your cookies air dry (over night or for at least 4-5 hours) but we like to use a heater fan to speed up the dry time. It also helps the surface of the icing dry with a smooth glossy finish. You only need to leave them in front of the fan for about 20 min - or until you can see the surface of the icing has crusted over. You’ll have to adjust the dry time depending on your weather and climate. Remember to handle your cookies with care. Even though the surface is dry enough to continue decorating, the icing is still very wet underneath and can be easily damaged.
STEP 2
Once you’ve cut all of your flowers along the blue stripe of color, use scissors to trim the jagged edge off so you have a clean edge to start punching along the purple stripe.
While you’re waiting for your cookies to dry, you can start making your wafer paper flowers. These are totally optional but we liked the extra details. We start by airbrushing the wafer paper FIRST and then use the craft punch to cut out the desired number of flowers. Because we’re using so many different colors for this cookie design, you can airbrush stripes of each color down a single sheet of wafer paper - wide enough that you can punch an entire row of flowers across each stripe. If you airbrush your colors in the right order, they’ll overlap perfectly to create all of the perfect in-between shades.

STEP 3
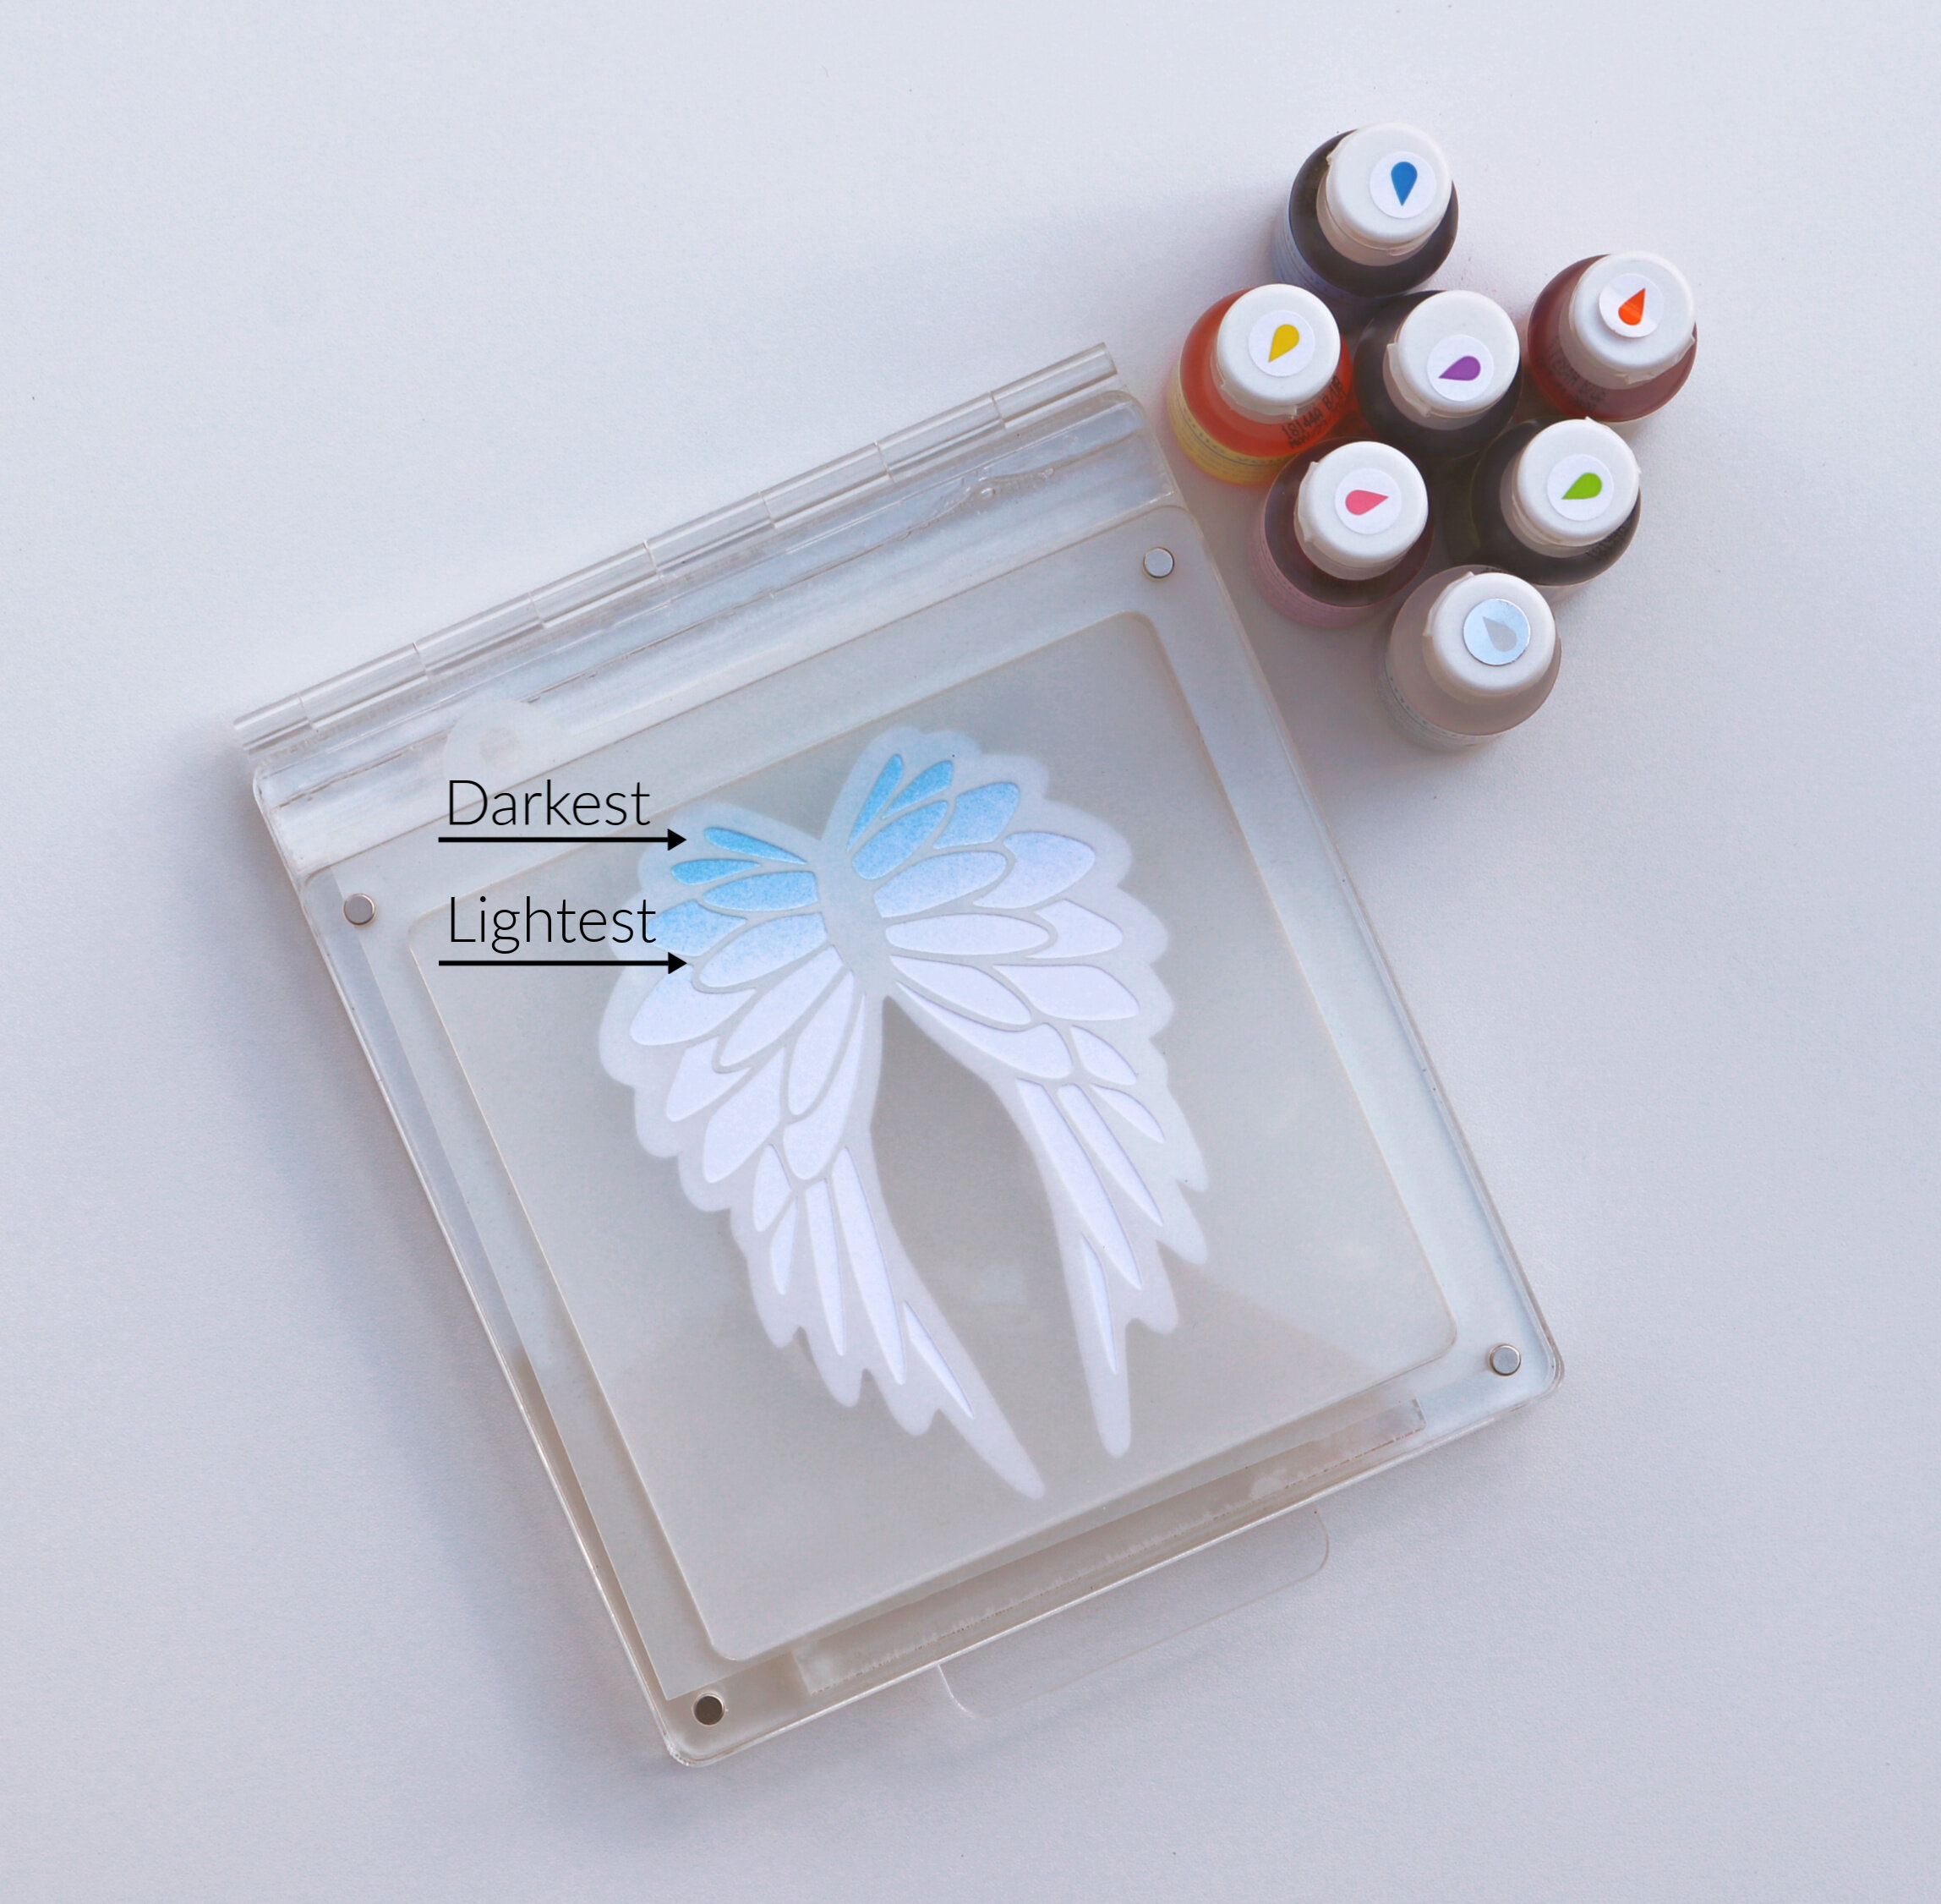
Now you’re ready to airbrush your wing stencil on your cookies. We love to use this STENCIL HOLDER when we’re making several cookies of the same design. Trace your cutter on paper and slide it in the clear pocket at the back. Line the stencil up with your tracing. Now as you move cookies in and out of the stencil holder, you can match the cookie up with your tracing and know that the stencil will also be lined up just the way you want it every time.
You’re going to want to work in the same color order you did for the sheet of wafer paper so your overlapping colors look amazing!
blue
purple
pink
orange
yellow
green
Start at the top of the wings with neon brite blue. You’re going to try to blend horizontal stripes just like we did with the wafer paper. Try to make the darkest color at the top of the stripe and let the color fade away at the bottom so you can overlap and blend the next color - purple. Repeat this same process for each color. Allowing the colors to overlap and blend a little will create smooth color transitions and it also creates all of the pretty “in between colors” (pretty sure we just made that term up). With the overlap, you end up with 12 colors on your wings instead of just the 6 colors you’re airbrushing. Once your wings are completely airbrushed, you can remove your cookie from the stencil holder and lightly airbrush the entire cookie with metallic pearl to give it all a little more shine and sparkle.


STEP 4 (OPTIONAL)
I know, we said 3 steps… step 4 is optional so it doesn’t necessarily count. If you’ve decided to add the wafer paper flowers, that’s all there is to this step. We like to lay the flowers out on the cookie and experiment with the sizes and arrangement until we’re happy and then we start gluing. Use the needle tip applicator bottle to place a small dot of corn syrup right where the center of the flower will sit. Use your tweezers to carefully pick up each flower and set it down on the dot of corn syrup. Add another dot of syrup to the center of the flower and use your tweezers or Cake Katana to add the sprinkle in the center. Lightly press down on the sprinkle to secure it all together and allow the cookies to air dry completely overnight.
There are so many cute combinations for this design when you start experimenting with different airbrush colors, embellishments and details. I’m pretty every sprinkle in our cookie cupboard would look adorable on these. We’d love to see all of the different ideas you have for these!


