


UNICORNS
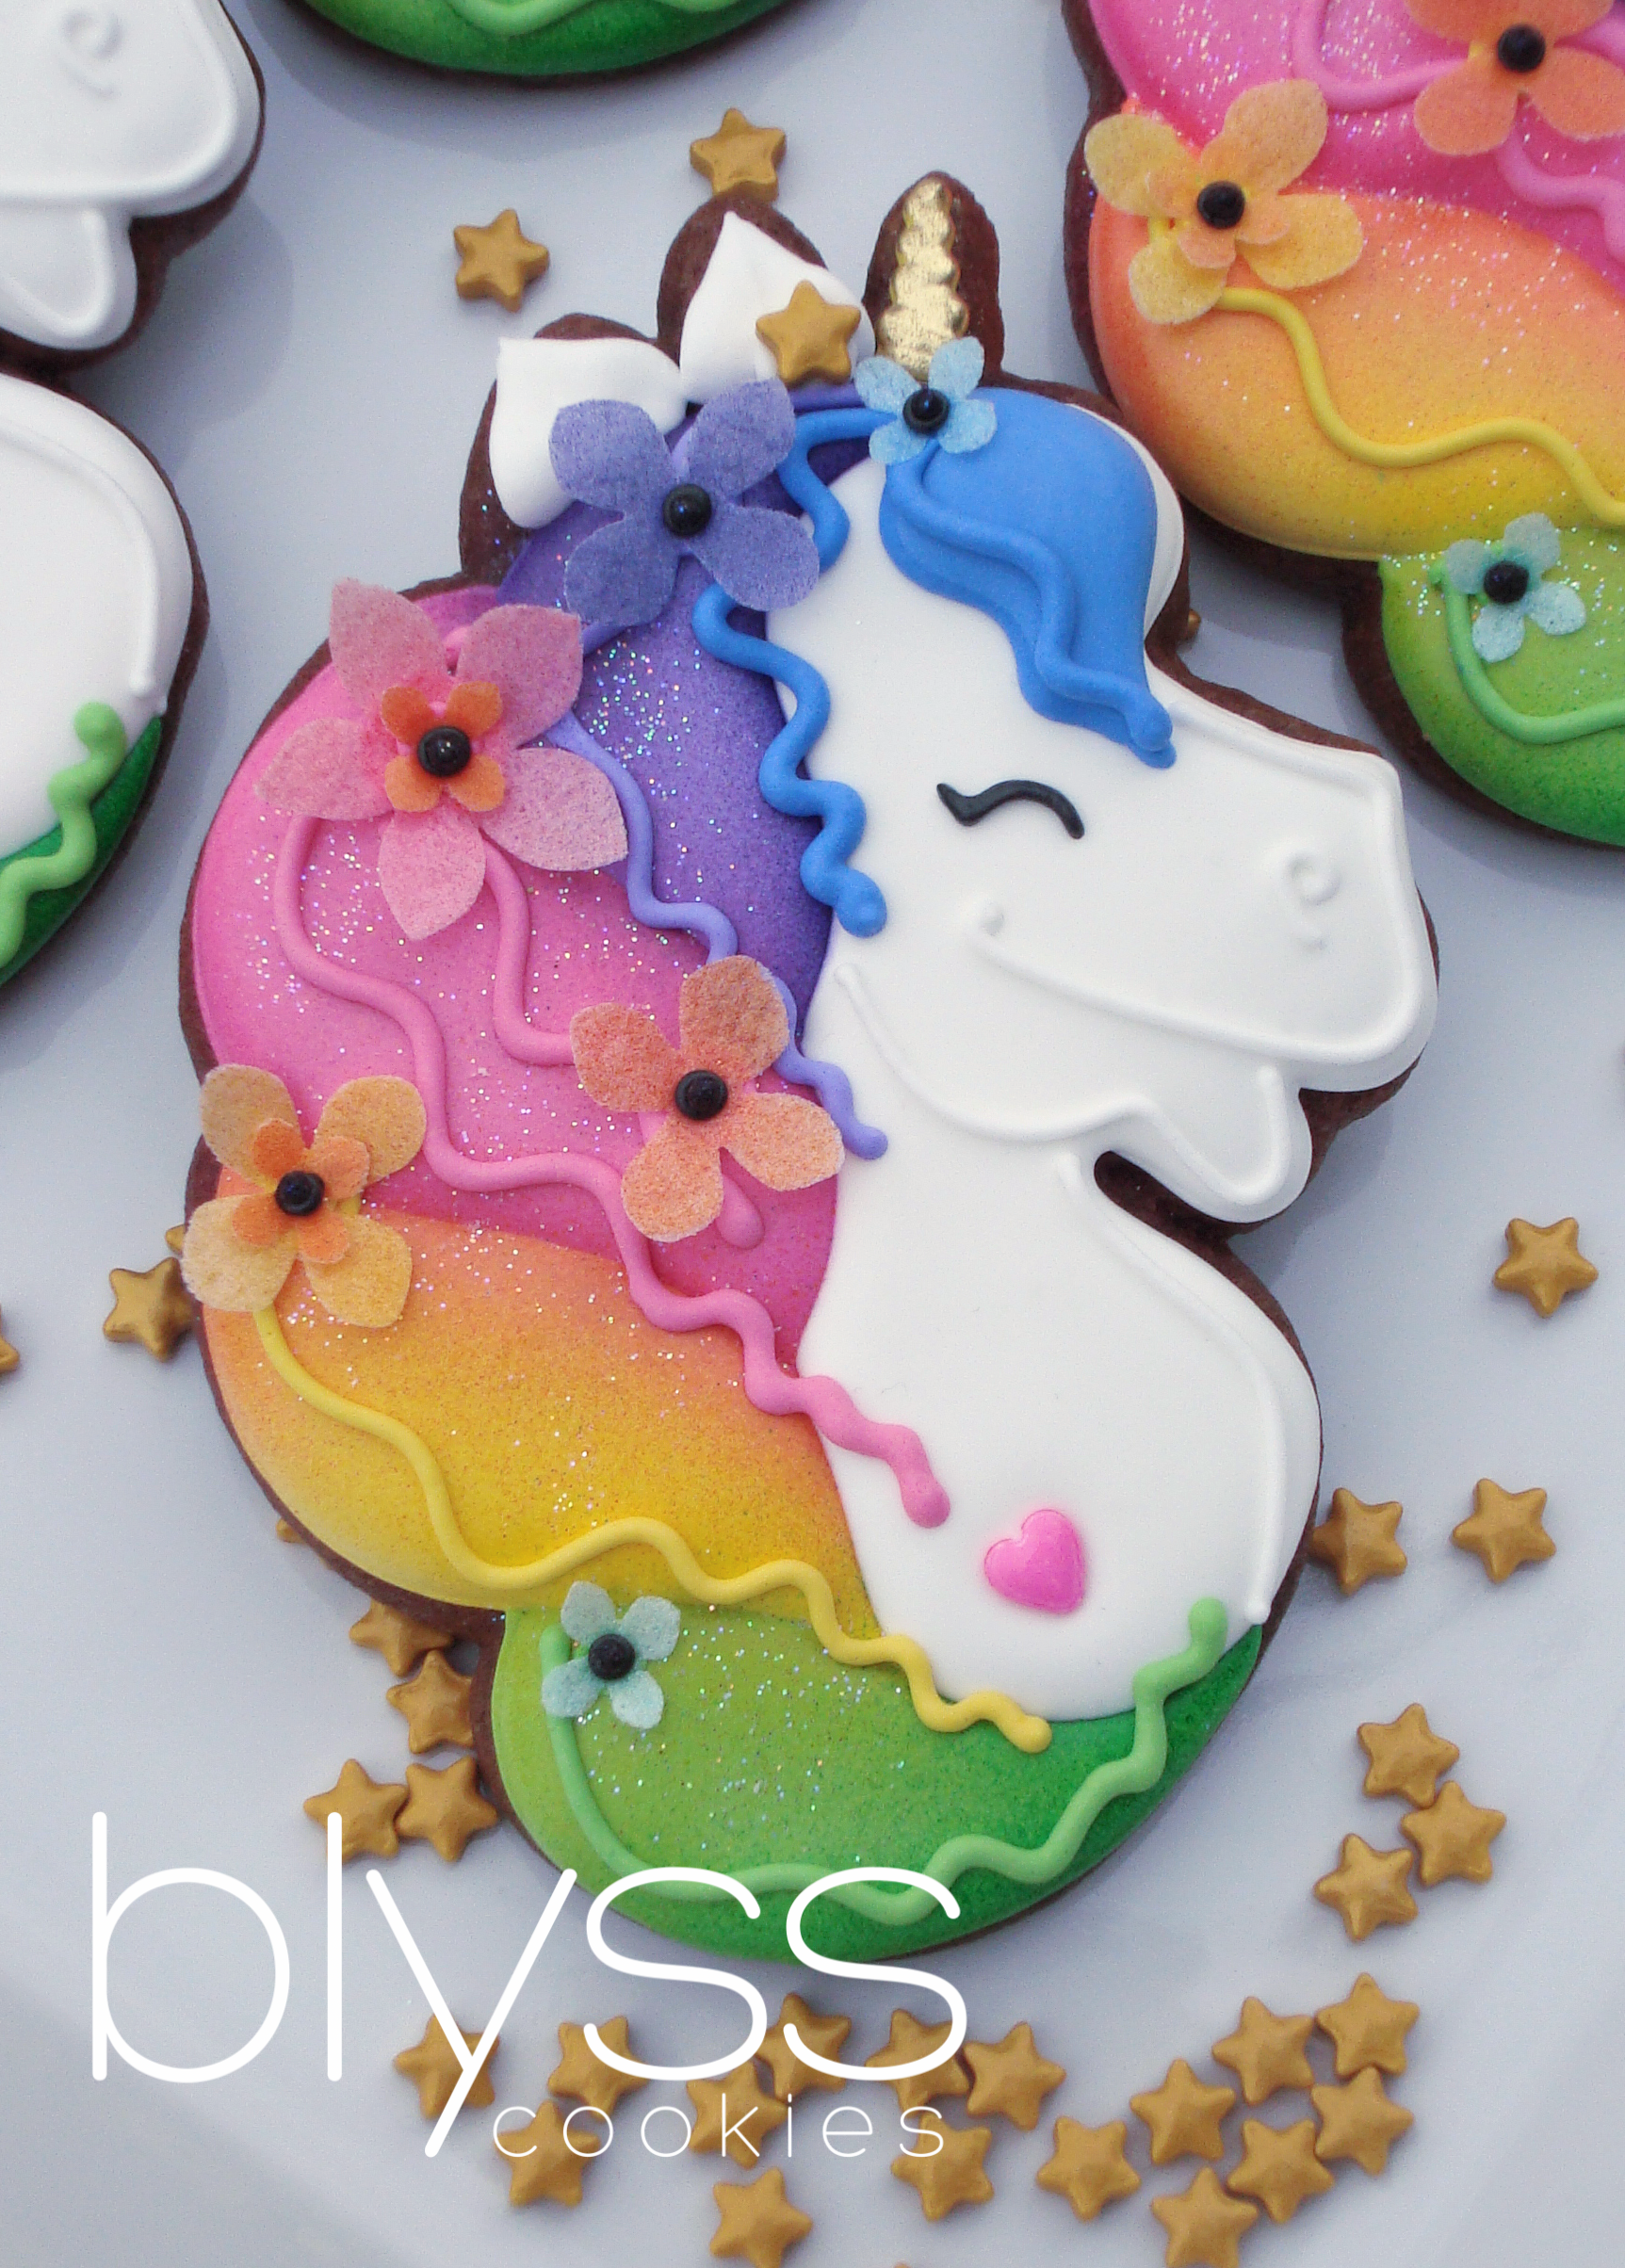
Have unicorns completely taken over at your house like they have at ours? They cover our children’s wardrobe, they’re on all of their school supplies, home decor, toys and even in their breakfast cereal! how many unicorn shaped baked goods did you see in your news feed this week? Chances are, you’ve probably seen a unicorn themed party or two as well! With unicorn inspiration all around us, where do we begin? We asked the experts at our house. They said the best unicorns are bright and colorful and they’re covered in magical sparkly stuff… simple, right? SO, here you have it, folks. We call her Sparkle the unicorn.
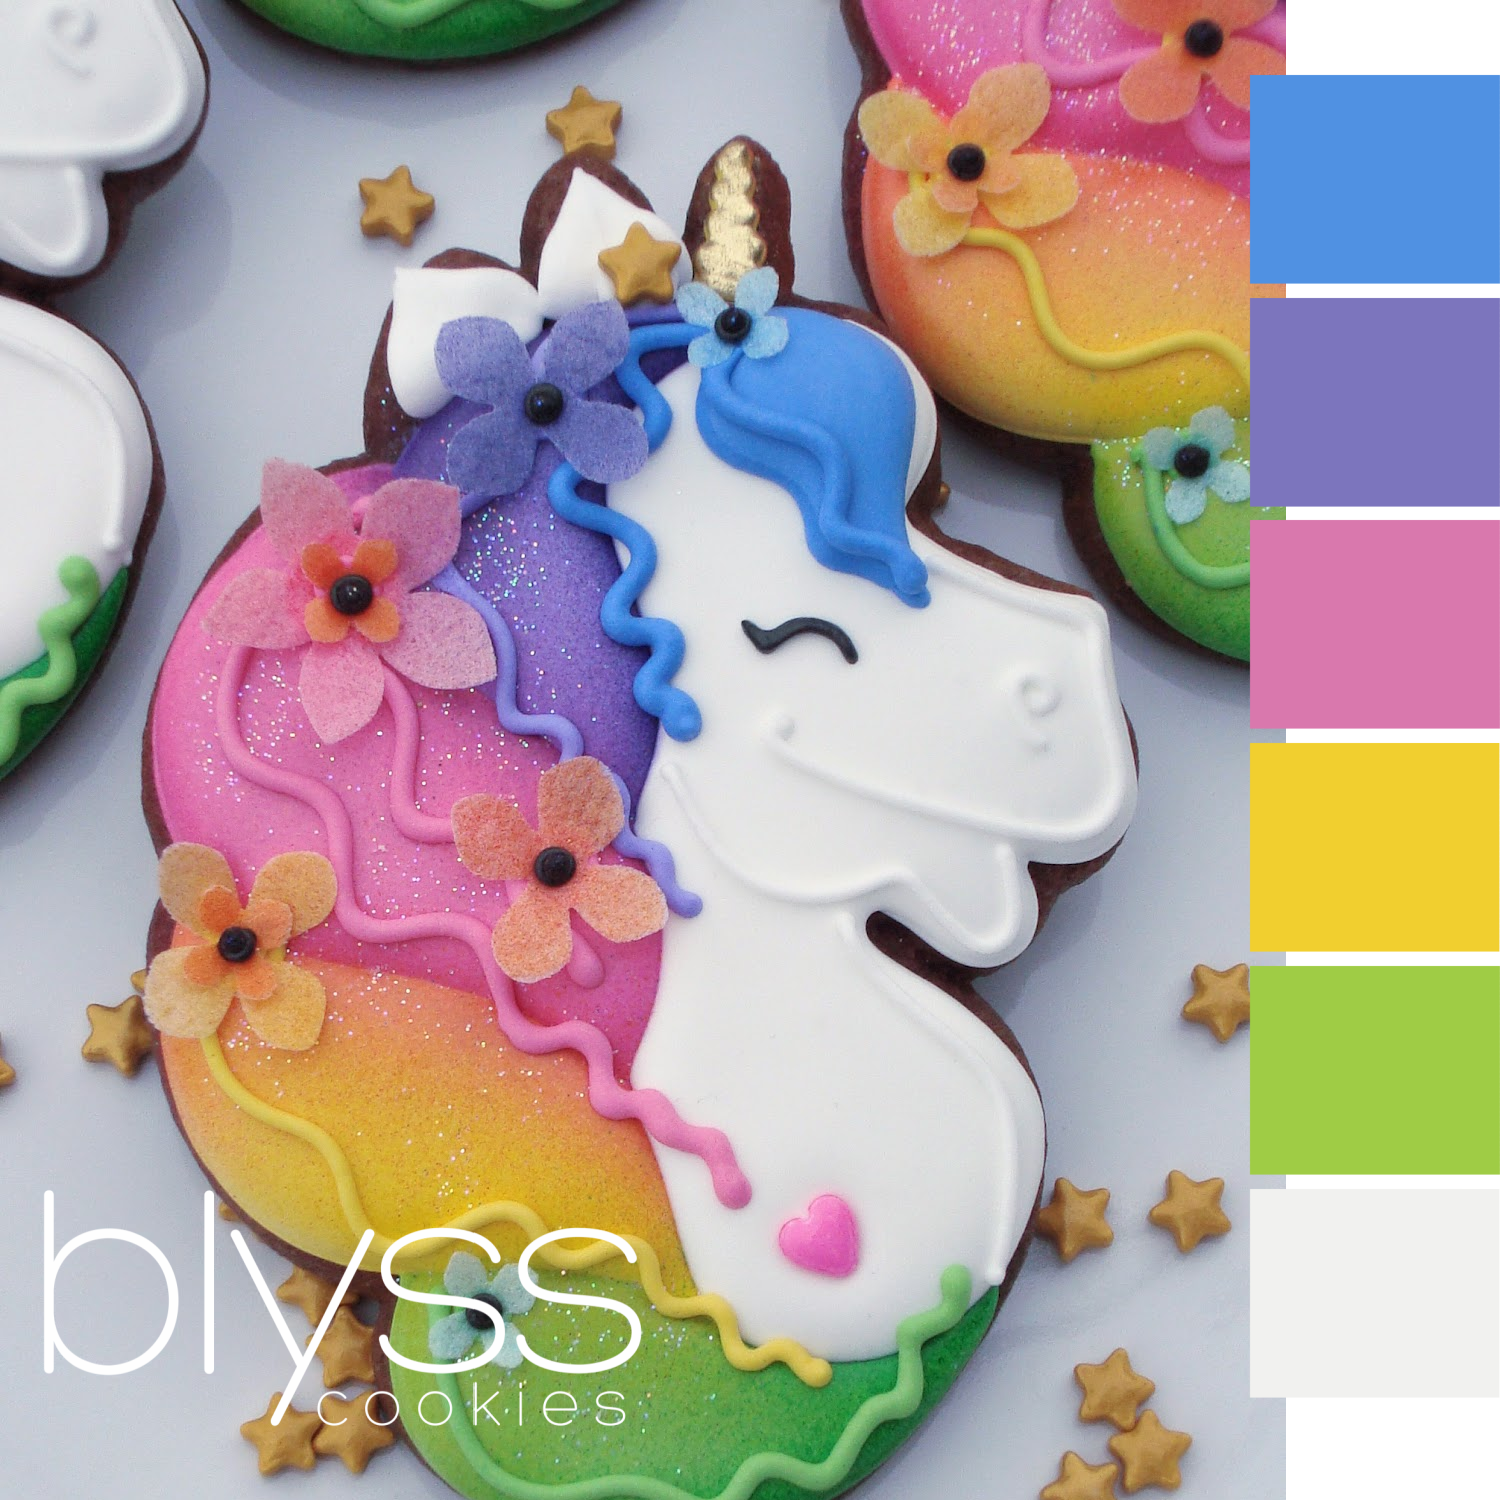
Icing Colors
A small amount of white piping and flood icing
A small amount of purple piping and flood icing
A small amount of pink piping and flood icing
A small amount of yellow piping and flood icing
A small amount of green piping and flood icing
A small amount of blue piping and flood icing
A small amount of black piping
YOU CAN FIND OUR FAVORITE AIRBRUSH COLORS HERE

Supplies
Unicorn cookie cutter (we used this one from Sweet Sugarbelle)
Disposable icing bags (like these)
Squeeze bottle for flood icing
Icing bag clips (we like these)
Decorating tips PME #1.5, Wilton leaf tip # 352
Tweezers
TMP Super Gold and a small amount of Everclear or even vanilla extract will work
Small paint brush
Sprinkle embellishments of your choice (we used these hearts , stars and these black Nonpareils)
Wafer paper (we like this kind)
Flower craft punch (like this one)
Airbrush (this one is our favorite)
Airbrush colors in purple, pink, yellow and green
YOU CAN FIND OUR FAVORITE AIRBRUSH COLORS HERE
Jewel Dust (we buy ours here)

STEP 1
Mark your baked cookies with a food writer marker. This helps keep everything precise and consistent. To make this easier, you can make yourself a template to trace out of paper.

STEP 2
Starting with purple, outline the different sections of hair with piping icing.
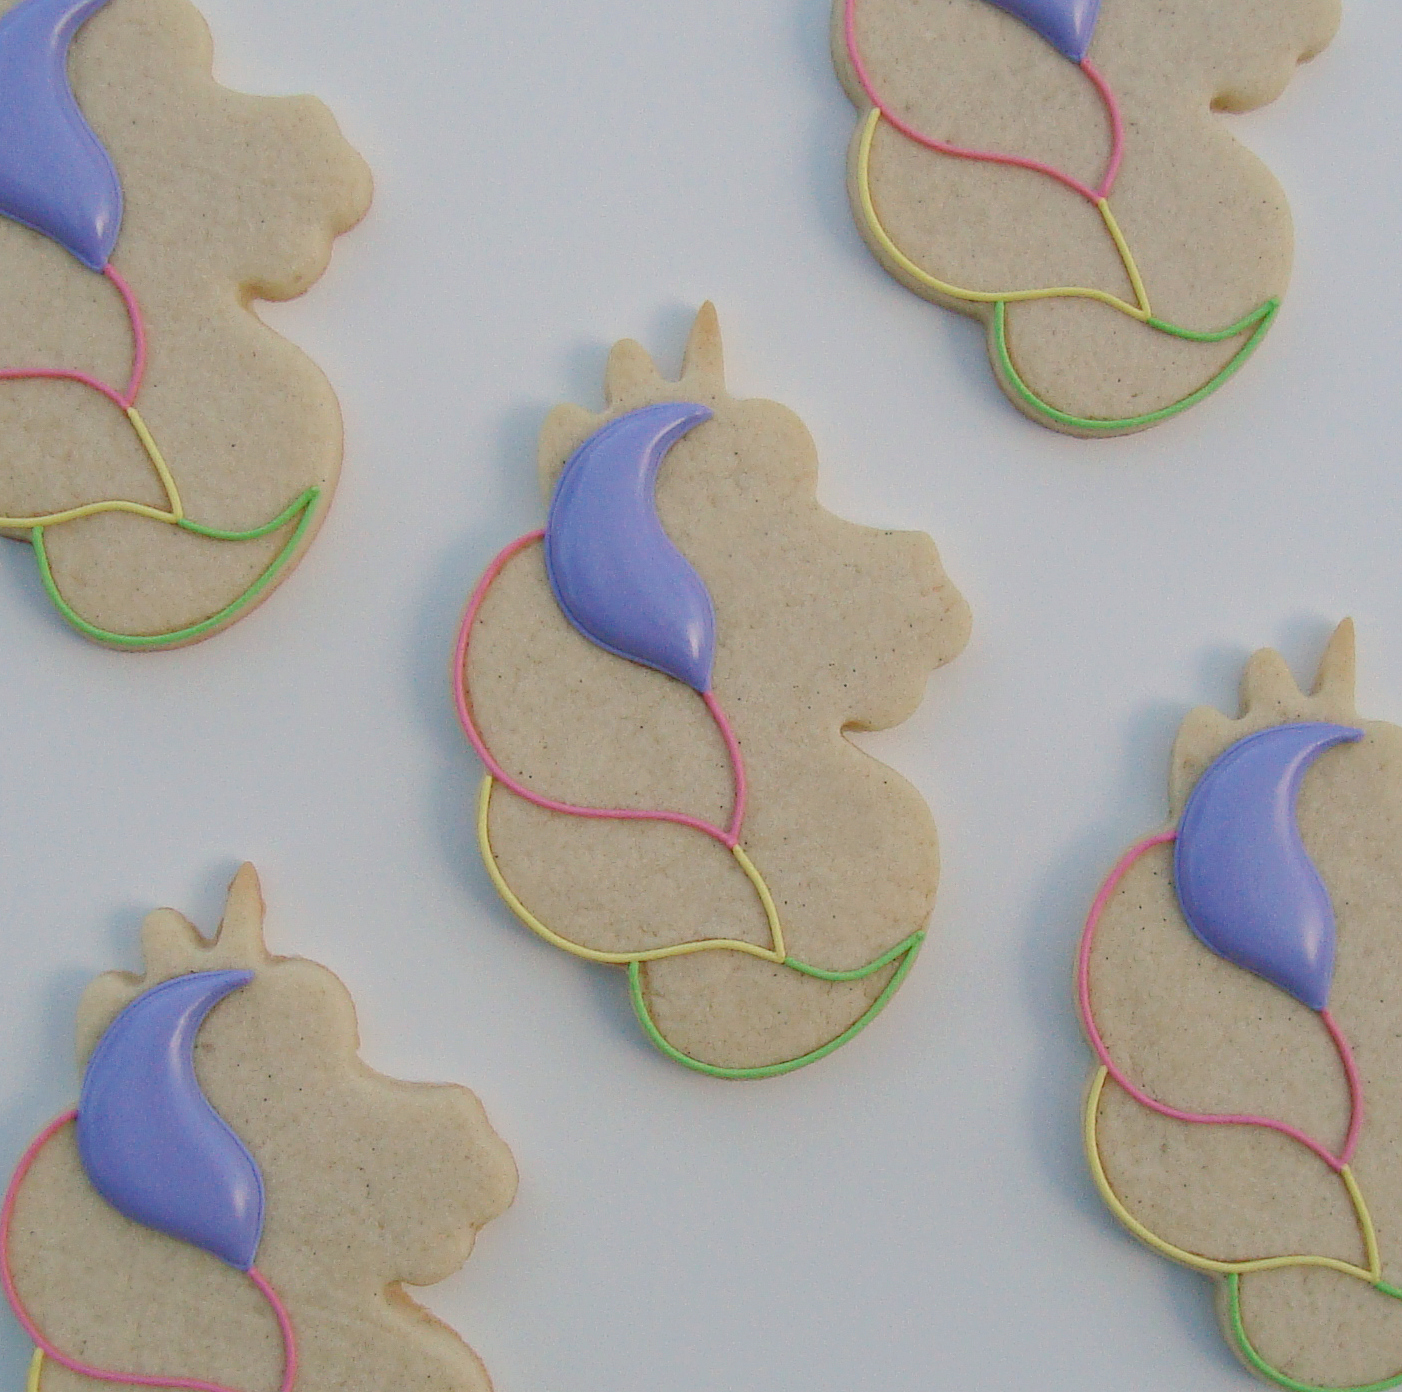


STEP 3
With flood icing, fill in the sections of the hair starting with purple. Allow each section to dry for 10 minutes before filling the next. This will keep the different sections and colors from joining together. You can speed up the process by drying the cookies in front of a fan. Once all of the sections are filled in, allow the cookies to dry for 30 minutes before moving on to step #4.
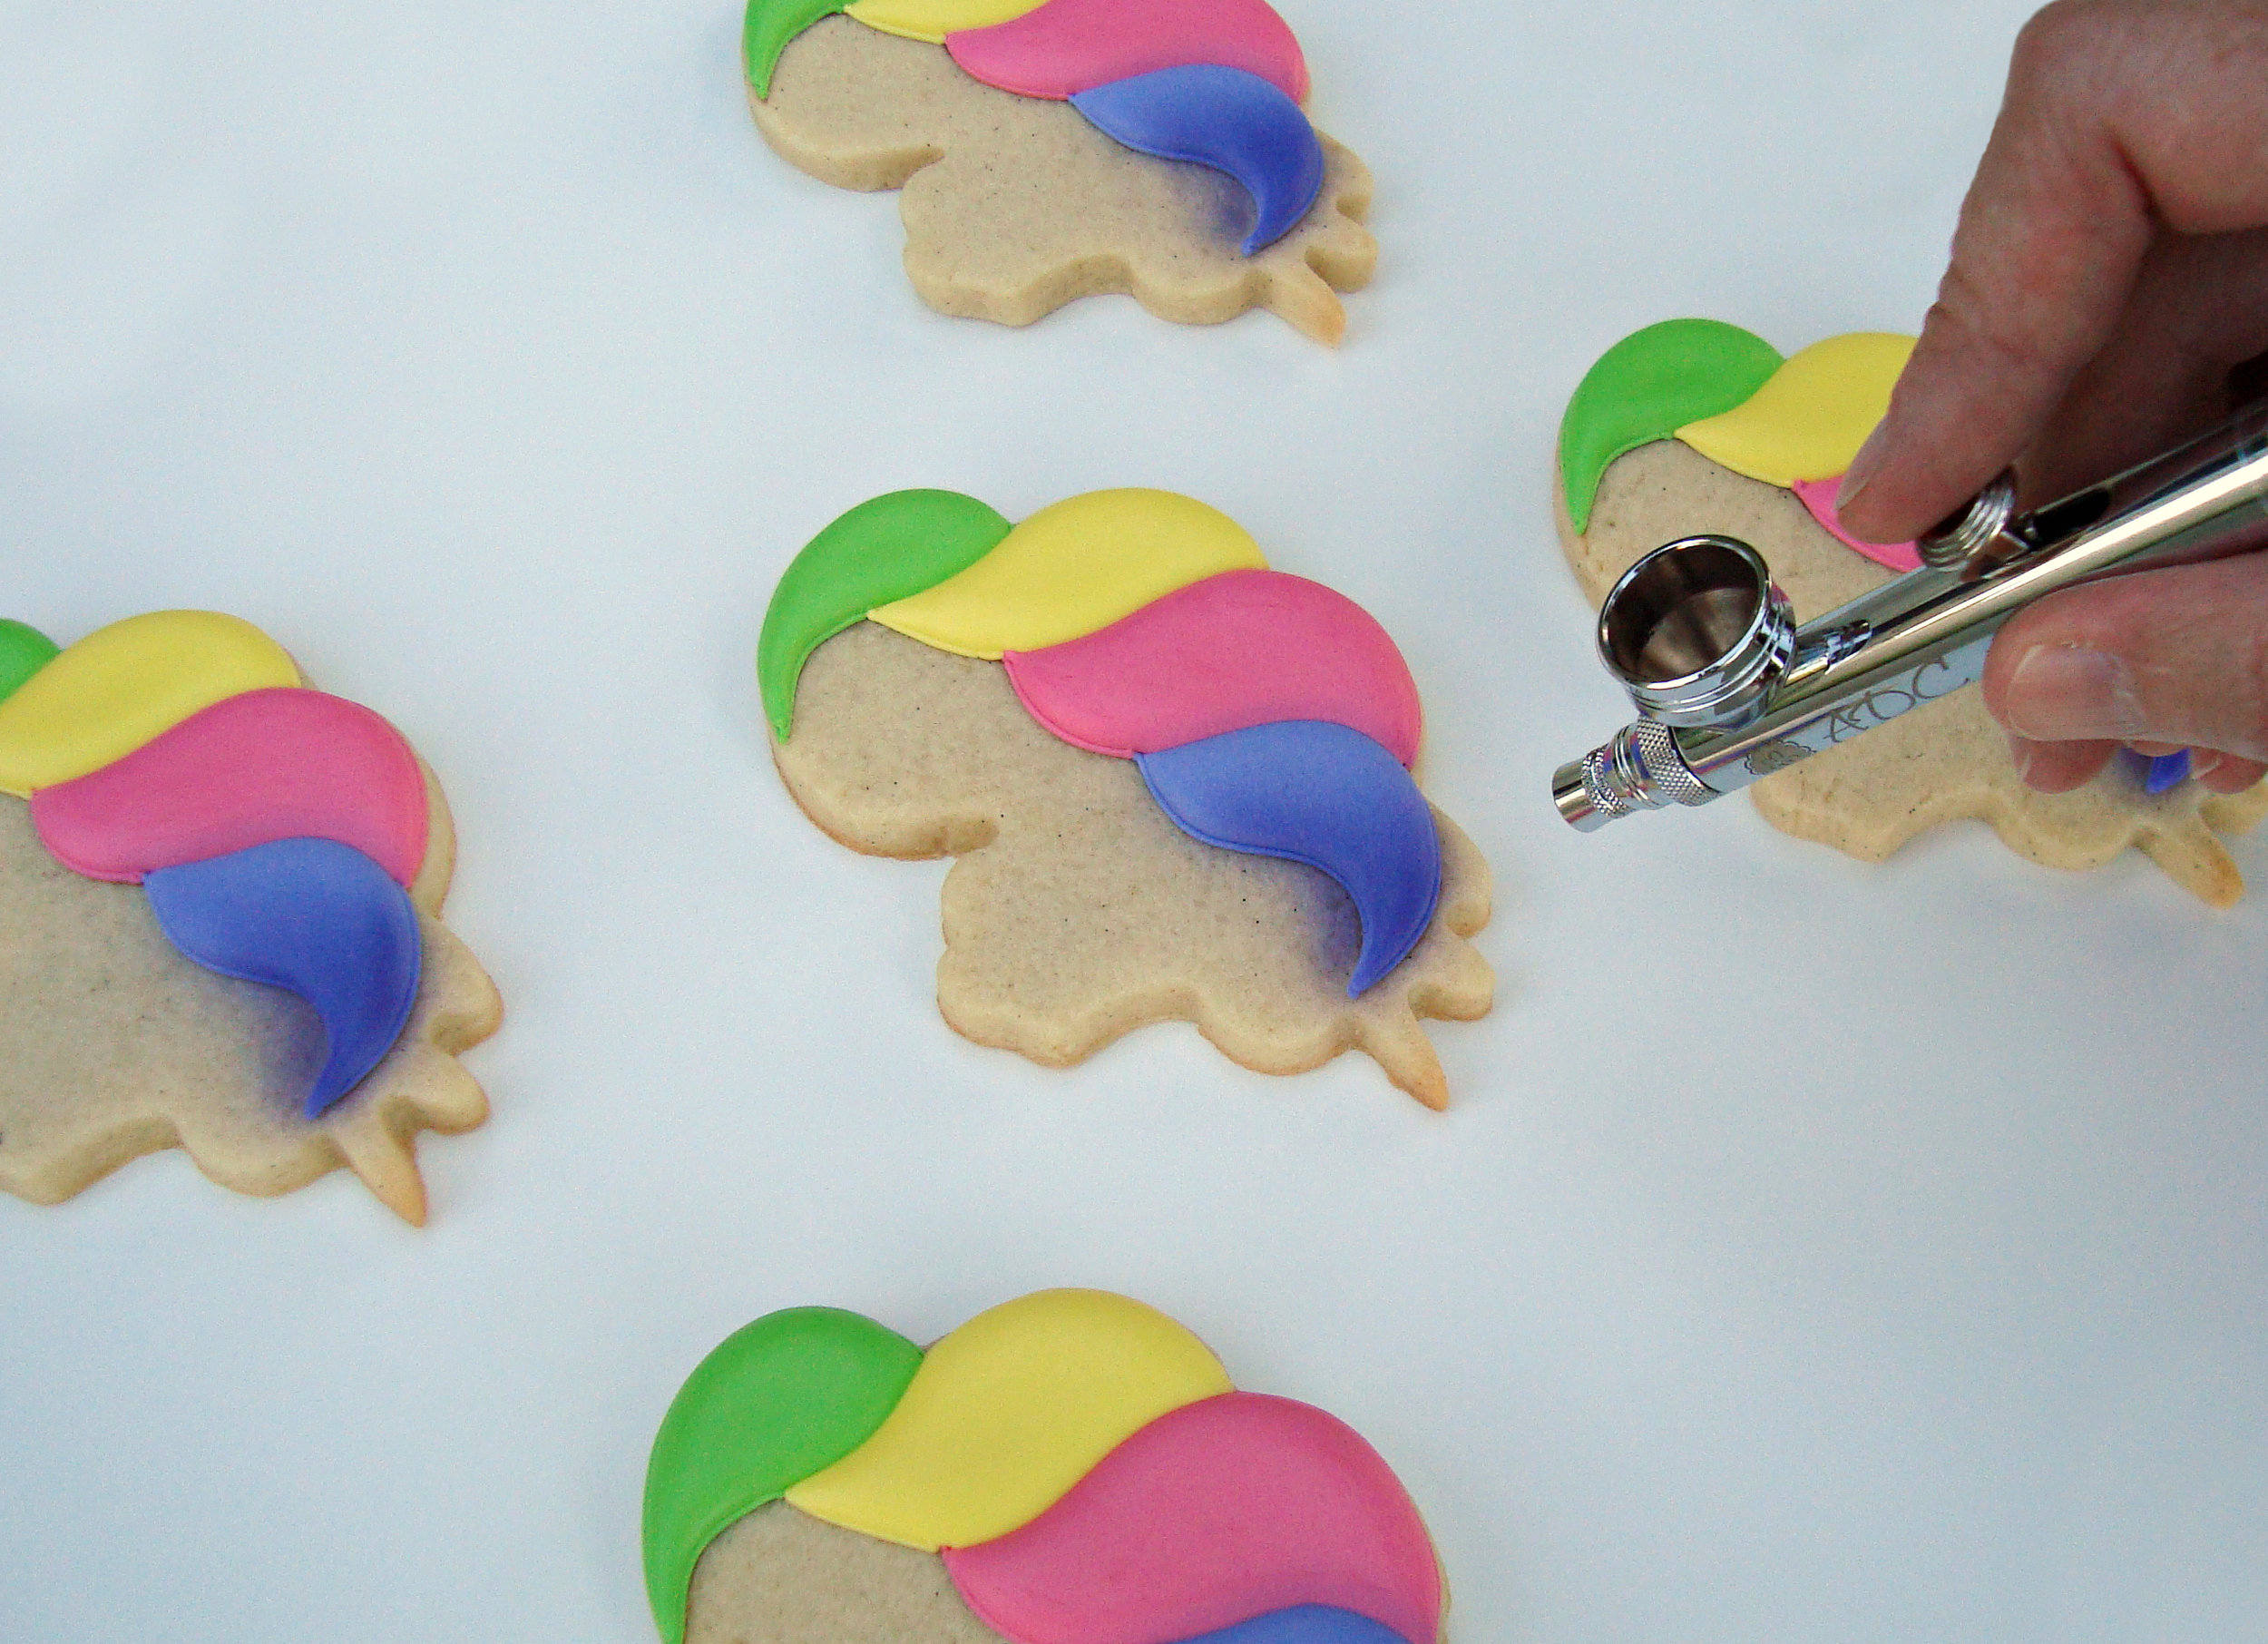


STEP 4
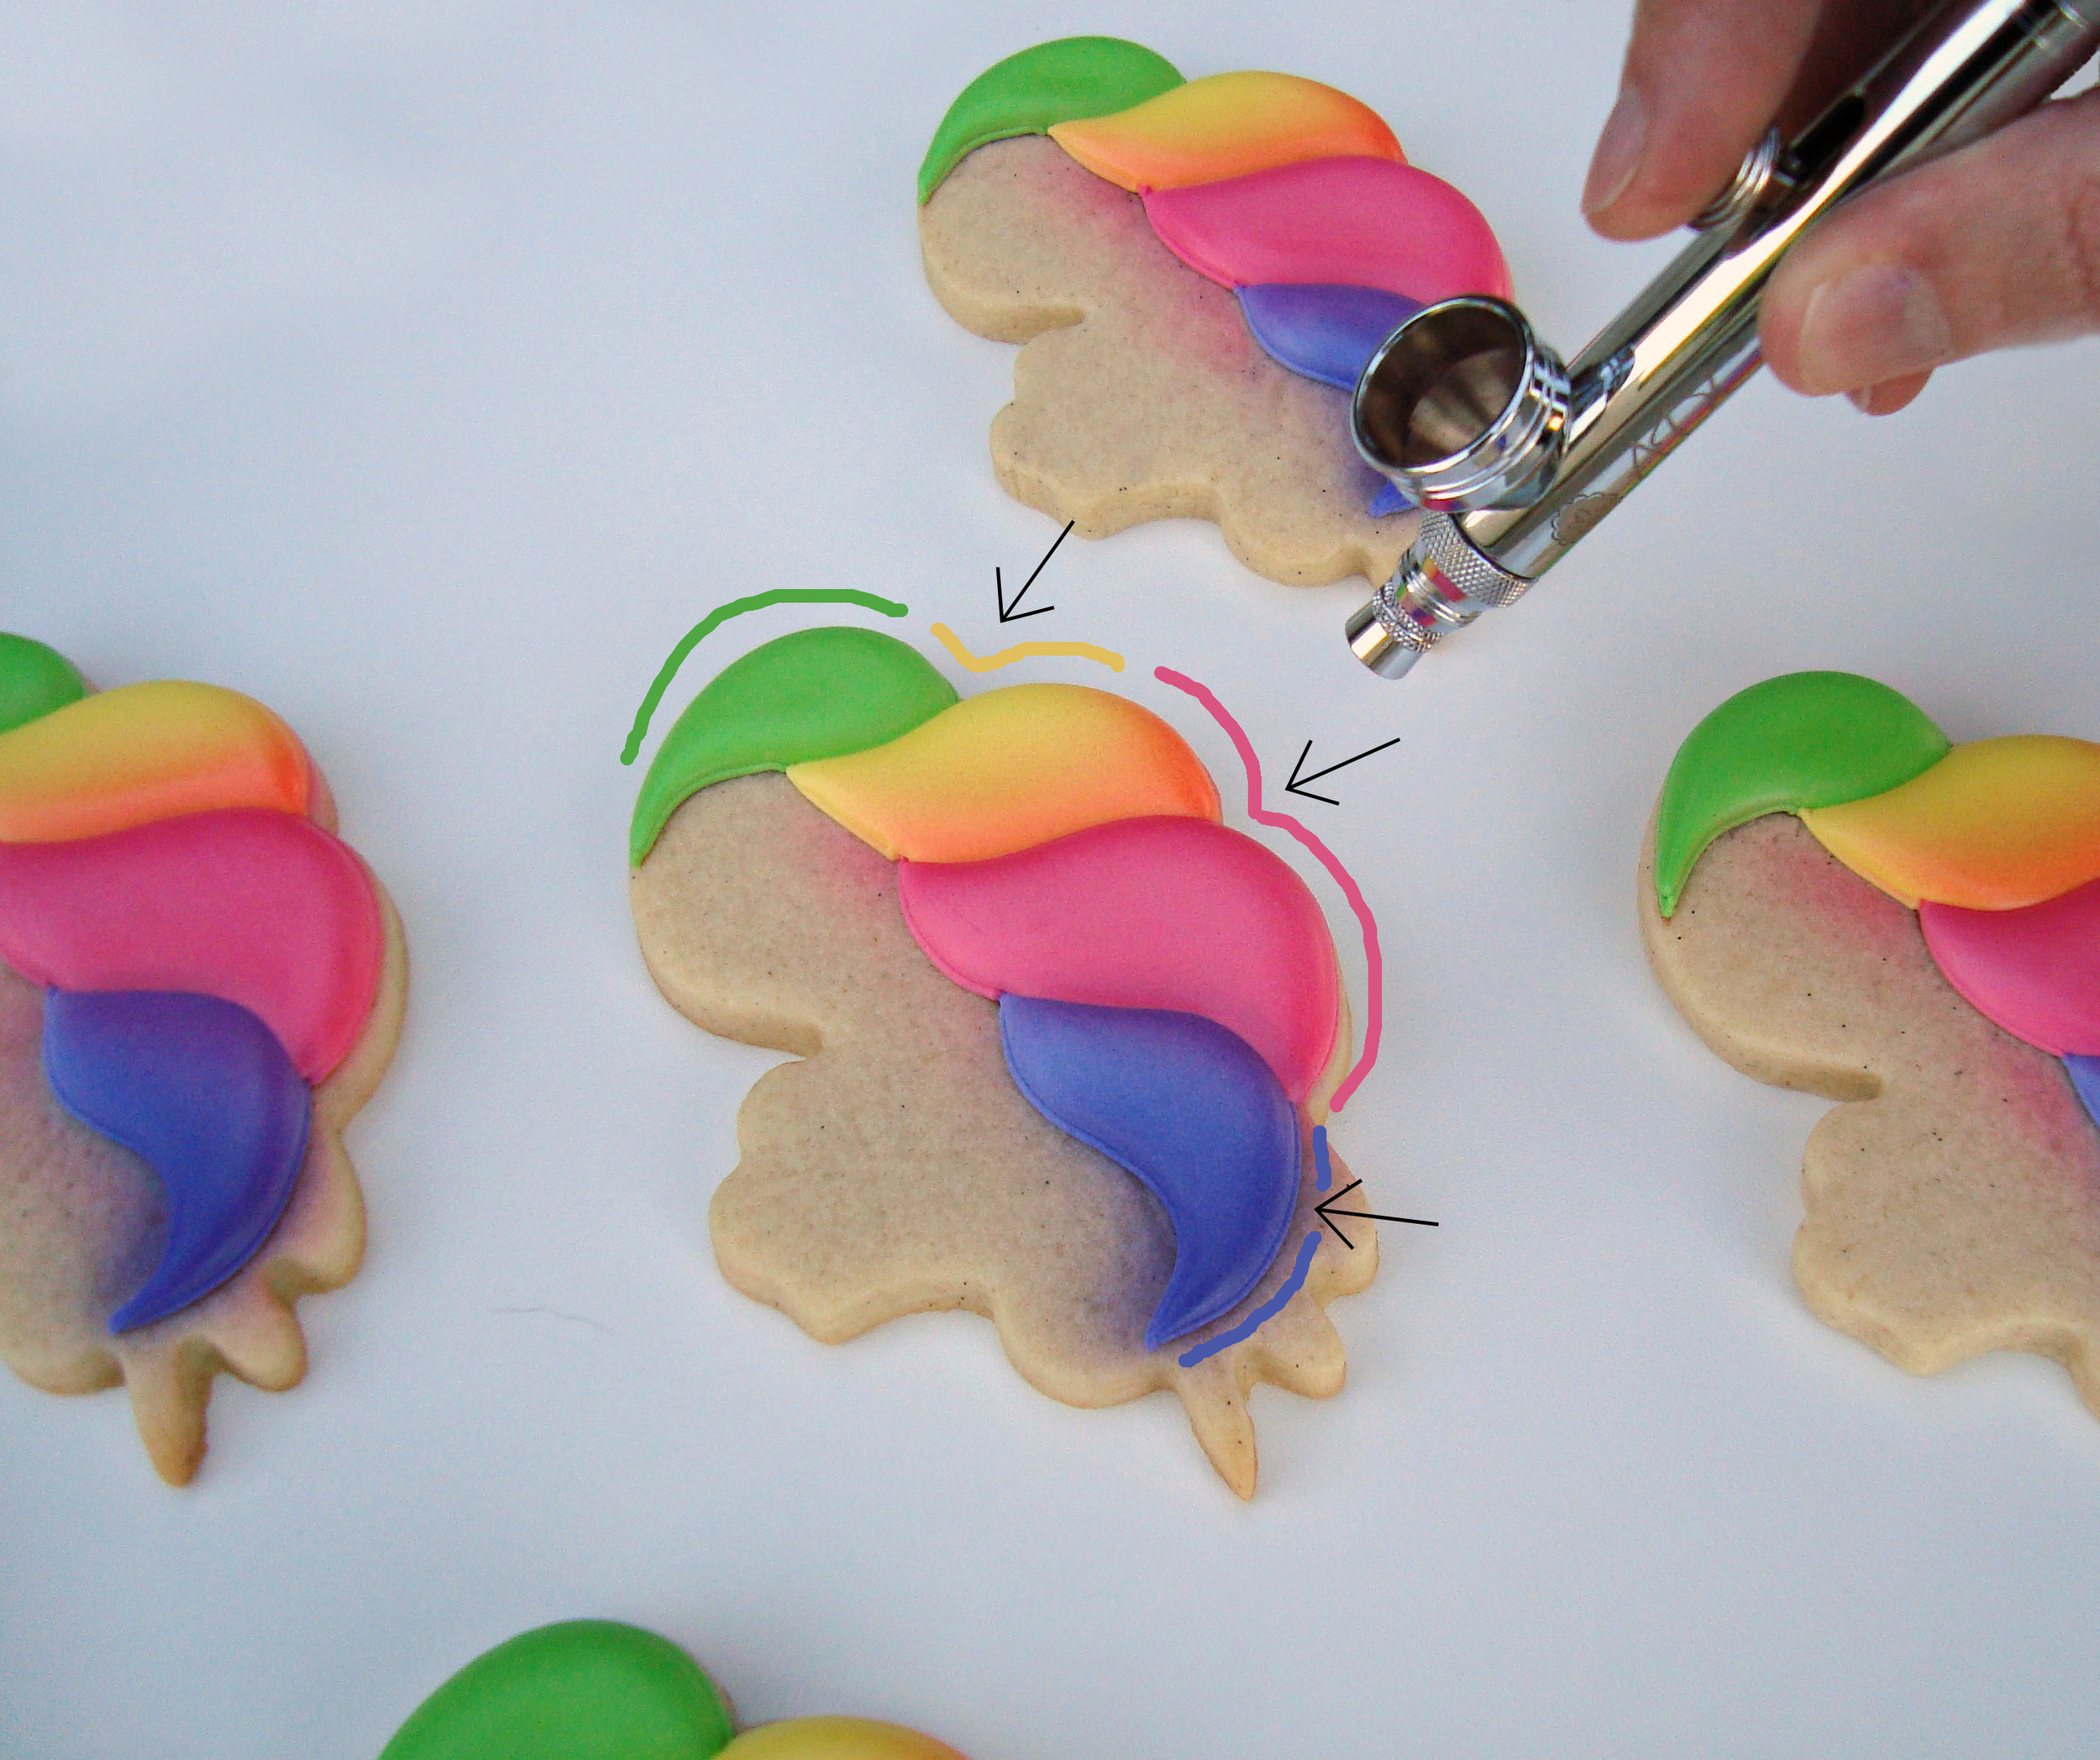
Start shading with your airbrush.
We used purple airbrush color to darken the top of the purple section of hair. As you shade, you want the darkest color at the top and the color should taper and fade away as you near the bottom of the purple section of hair (where the purple section touches the pink section). Try not to spray purple on the pink section. We like to spray the first color on all of our cookies before moving on to the next color.
Use pink airbrush color to shade the pink section of hair. Again, you want the darkest color at the top (the darkest color is marked with the arrow in the picture) and you want the color to gradually fade away. However, this time we are also going to spray the pink airbrush color on the yellow hair section. Overlapping the pink airbrush color on the yellow frosting will create a beautiful orange color. Again, add the pink to all of your cookies before moving to the next airbrush color.
Using the same technique, apply the yellow airbrush color next and then green will be last.
Use the colored lines we’ve added in the photo to guide you as you add the different airbrush colors. The lines show you where we started and stopped spraying each airbrush color. Purple and green are the only colors we didn’t overlap on any of the other sections of hair.
OPTIONAL
If you want to add the “magical sparkly stuff” to your unicorn’s hair, this is where we added the jewel dust. It will stick to the wet airbrushing in this step. Be sure it’s just a light sprinkle or it wont stay stuck to the cookie when the airbrushing dries.
Allow the cookies to dry for another 30 minutes before moving on to step #5.
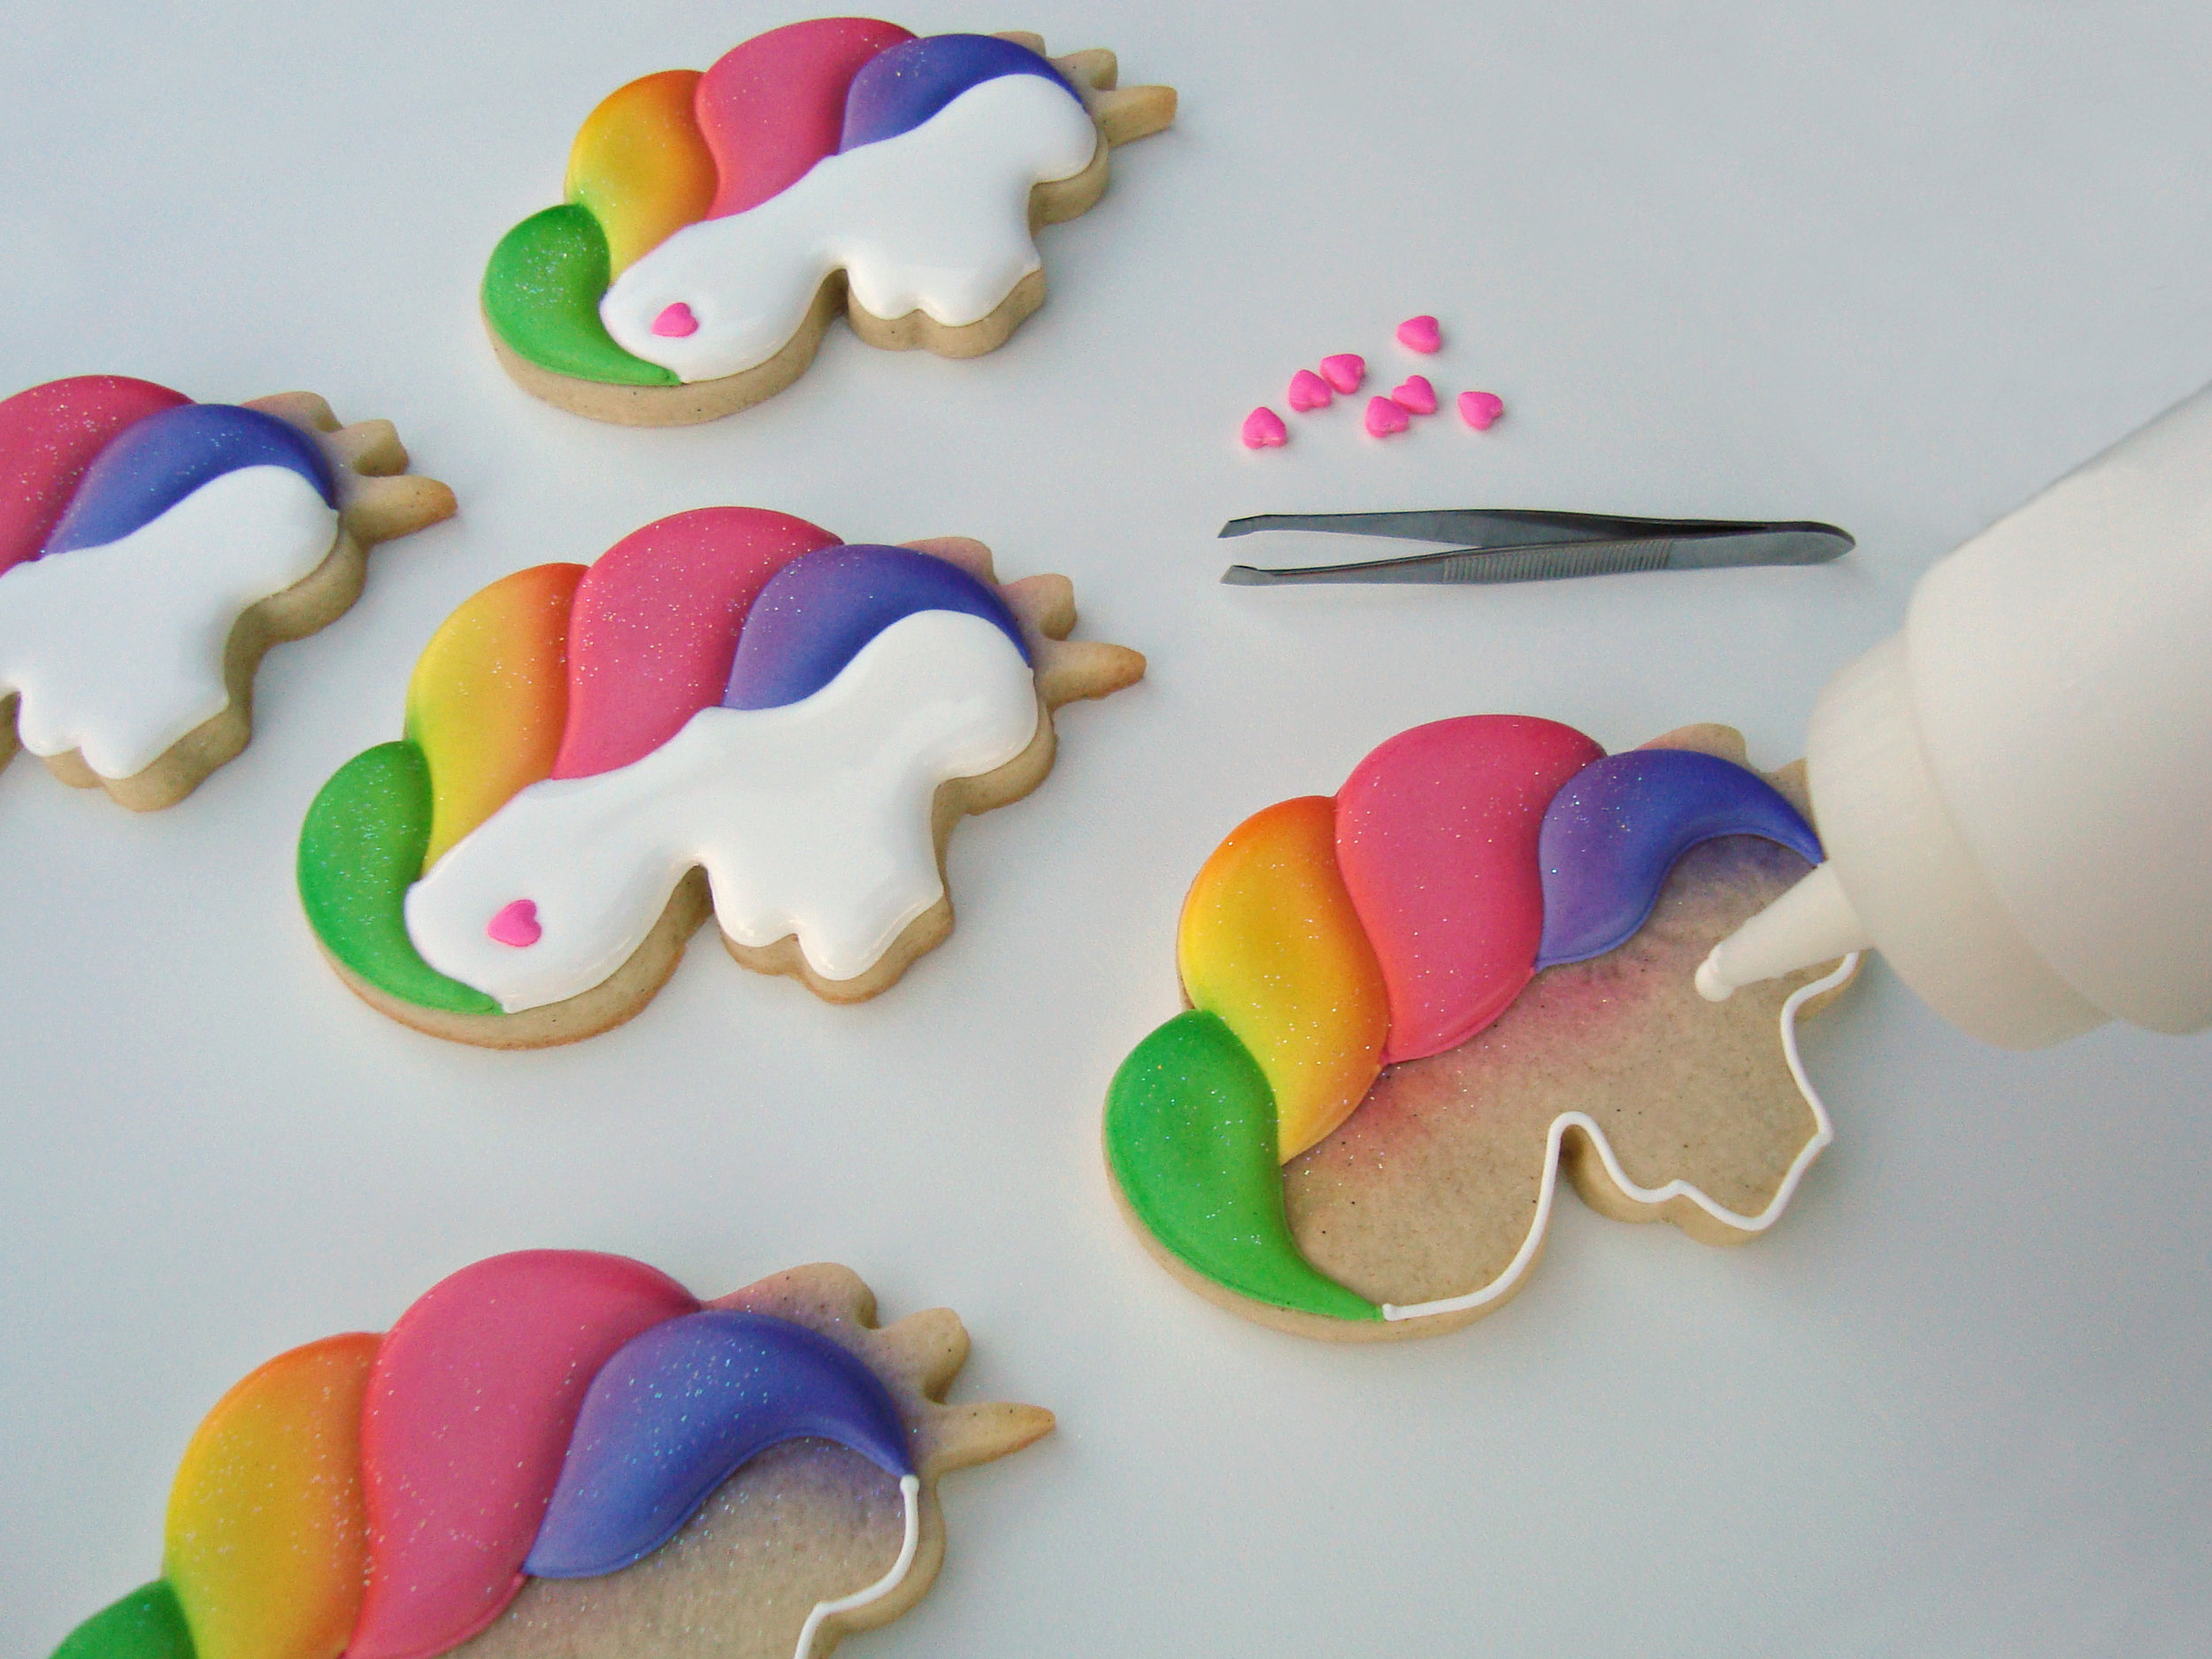
STEP 5
Using the white piping, outline the unicorn’s face. Fill the face section in with white flood icing. While the icing is wet, use the tweezers to drop in one of the heart sprinkles. Allow the white flood frosting to dry for about 10 minutes before moving to the next step.

STEP 6
Using the blue flood icing, add the top section of hair on the unicorns forehead.
NOTE - we did not outline this section of hair with piping icing.
STEP 7
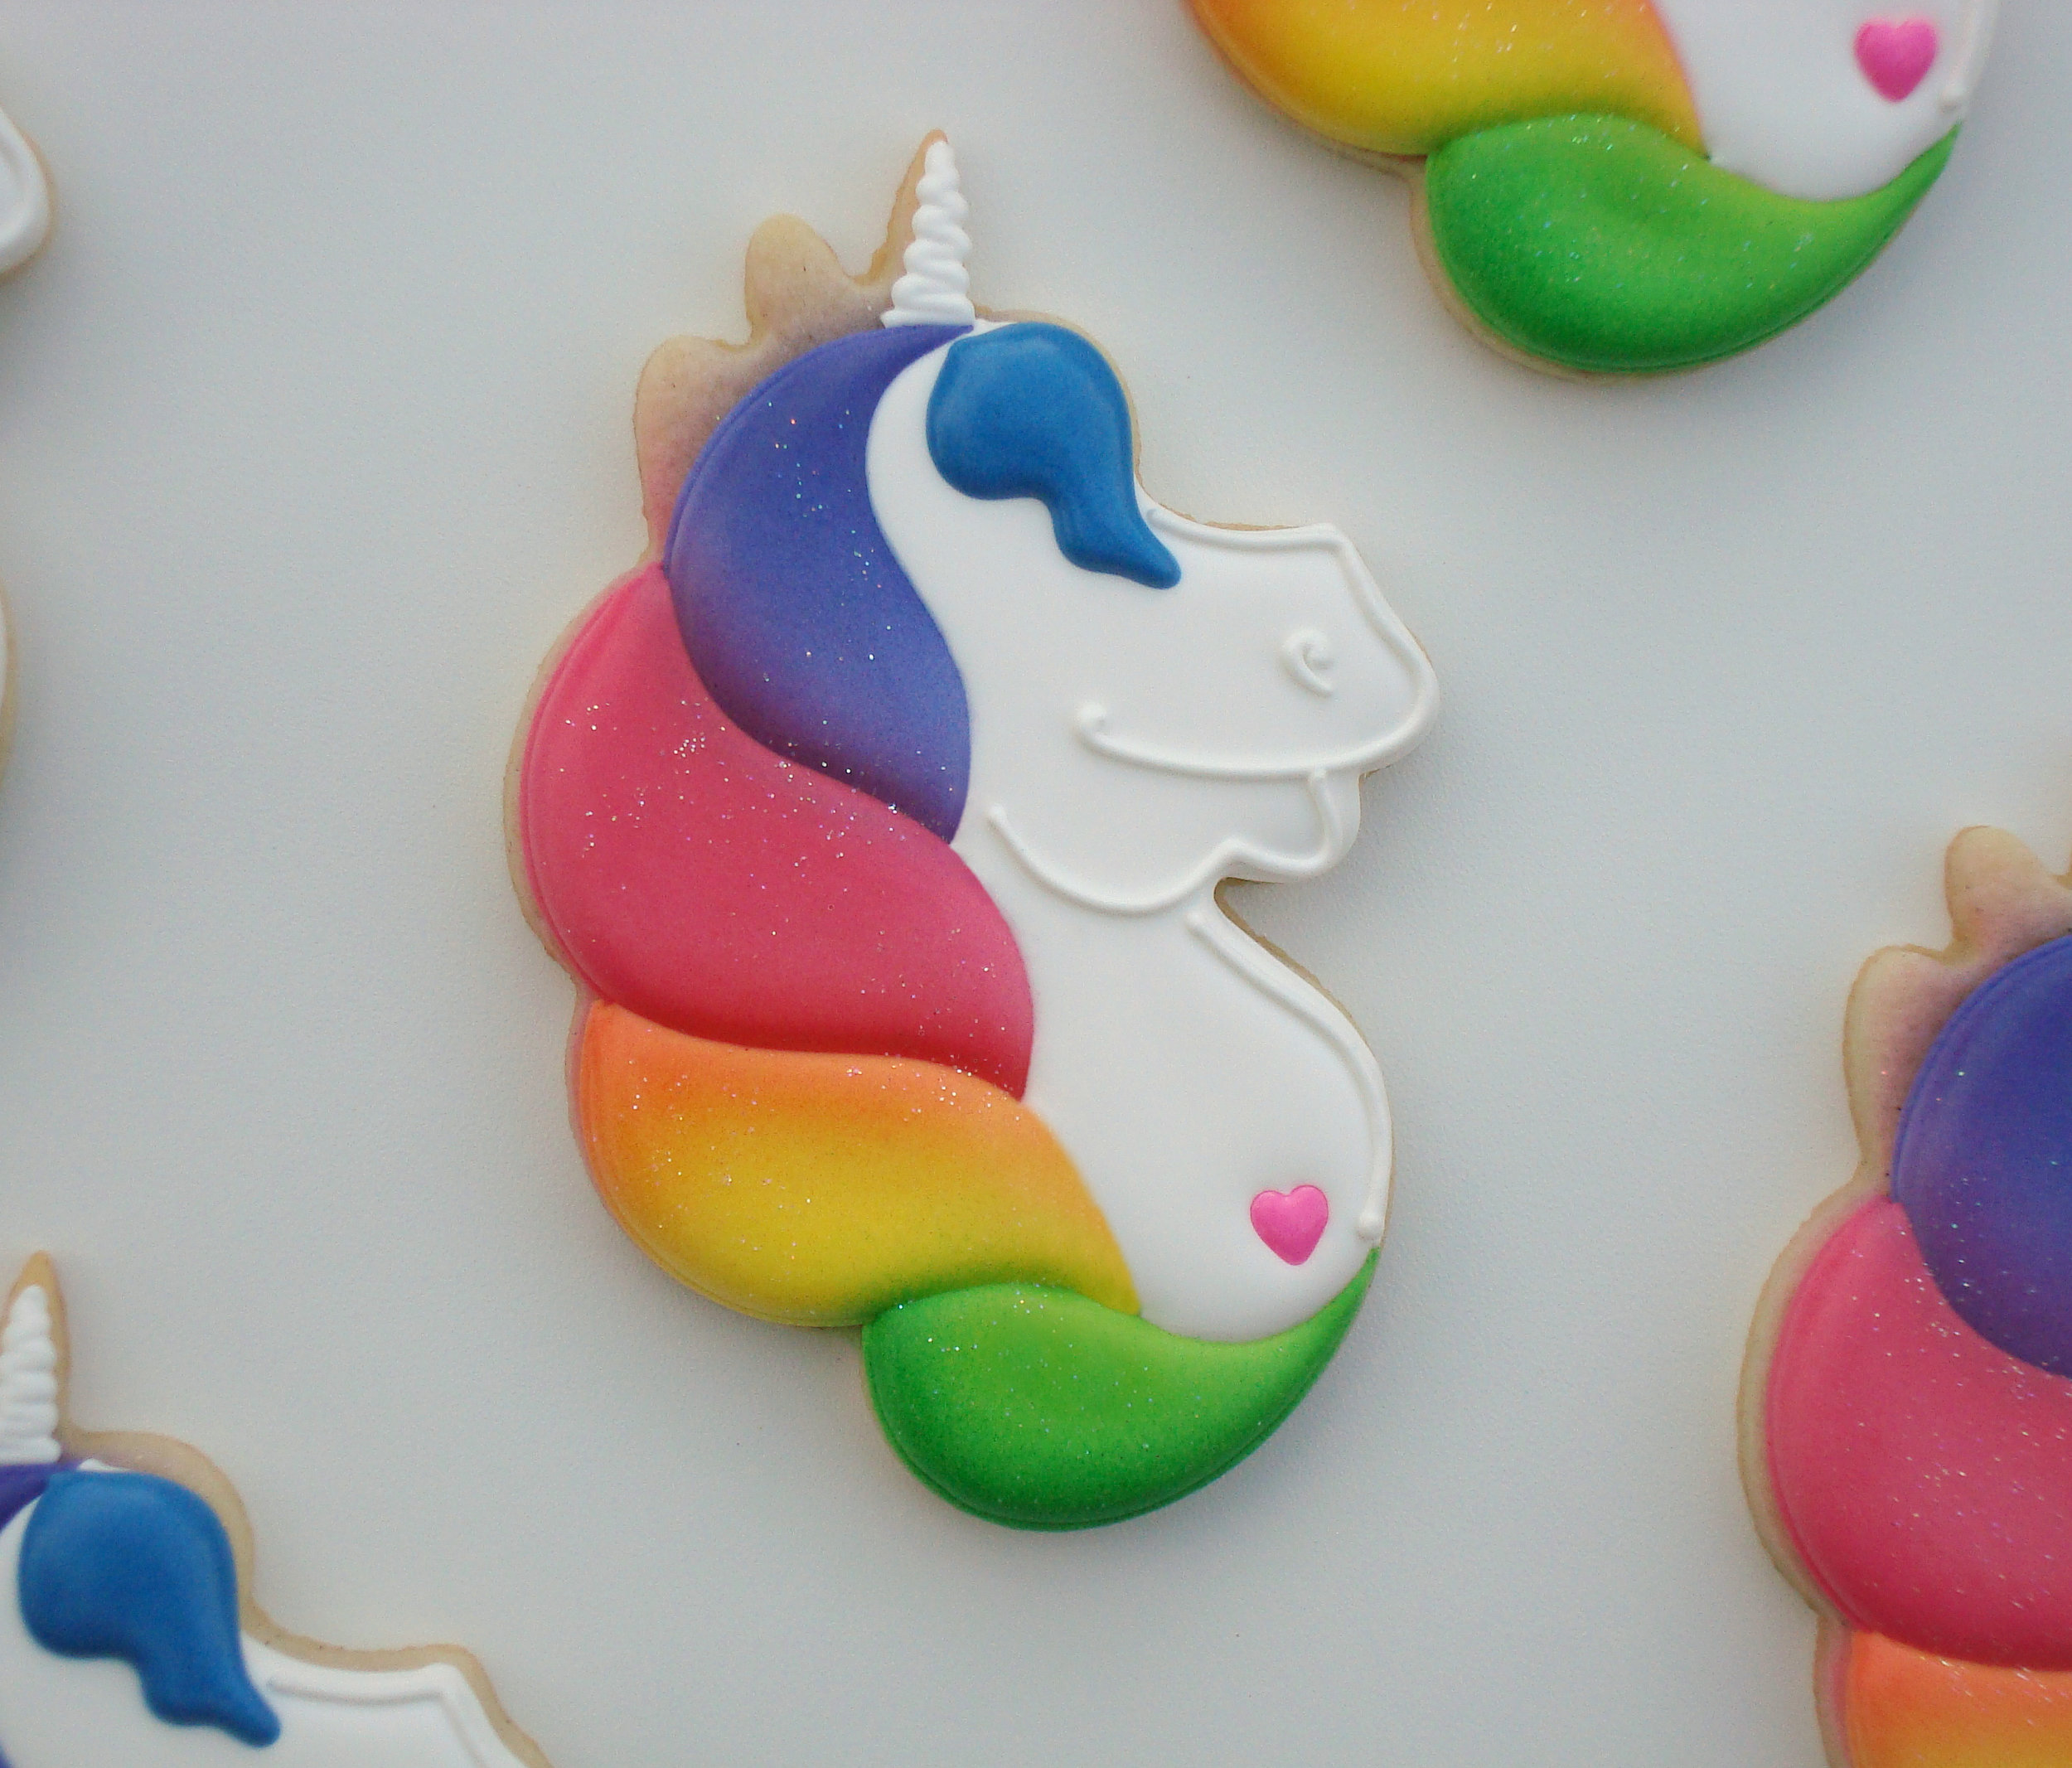
With the white piping icing, pipe the details on the face. We also added the unicorn’s horn with the white piping by zigzagging back and forth.

STEP 8
Change the decorating tip on your white piping and use the leaf tip to pipe the unicorn’s ears as shown. next you can start adding the squiggly hair details using all of the different colors of piping icing.


STEP 9
You’re ready for all of the finishing details!
In a small bowl, mix a small amount of the TMP Super Gold dust with a drop or two of Everclear or vanilla extract. Mix until it’s a smooth paint consistency. Use your paint brush to lightly brush it on the surface of the horn. This mixture will evaporate quickly due to the high alcohol content so you may need to add another drop or two of alcohol to the bowl as you go.
Glue the gold star sprinkle by the ear with white piping icing. Use the tweezers to drop the star in place.
Add the wafer paper flowers.
We like to airbrush a whole sheet of wafer paper first. This way you can color coordinate with each section of hair. then use a paper craft punch to cut flowers in each of the colors.
when you’re ready to glue them on, Pipe a small dot of piping icing on the cookie where you want to add the flower. Use your tweezers to gently drop the flower on the icing and push down in the center to secure it to the frosting. Once the flower is attached to the cookie, add another small dot of piping icing (we used black) in the center of the flower and use the tweezers to drop and push a small black ball sprinkle in the center.
Use the black piping icing to add the eye.
The best part about these unicorns is they are easy to customize. Change up the colors or change up the sprinkles and just like magic, you have yourself a whole new herd of unicorns with different magical powers.

