


TOOTHPICK ROSES

If you don’t decorate with royal icing accents, we’re here to change your mind! These little details add so much to your decorating and they’re so quick and easy. You can create all sorts of royal icing accents. It’s like making your own homemade sprinkles but for now we’re going to focus specifically on toothpick roses. We often make them with our leftover icing, let them dry, and then tuck them away in an airtight container for another day. That way, they’re ready to go the next time your cookies need a little something! They’re great for so many different occasions and making them is addictive! They’re small, dainty and beautiful but strong enough to hold up to cellophane bags and other cookie packaging. You can customize their color to match any design.

Supplies
Wilton 101s petal tip (you can also use a PME 57s or PME 56R but they are a little larger than the 101s from Wilton)
Stiff royal icing ( we prefer thicker icing for these details and will use the icing straight out of the mixer)
Toothpicks
Our Blyss toothpick rose stencil (we will explain why this is our favorite method later) OR if you don’t have the stencil, you can cut several small squares of wax paper (about 1.5” x 1.5” ) You’ll need one for each rose.
An airbrush (optional, used to add shading and dimension to the roses)
You should go into this knowing that toothpick roses take some practice. Especially when you’re first learning. It takes us a few roses to get “warm-up” each time we make them before we are happy with the way they look. Be patient with yourself and know once you get comfortable with the basic motions, it’s like riding a bike!

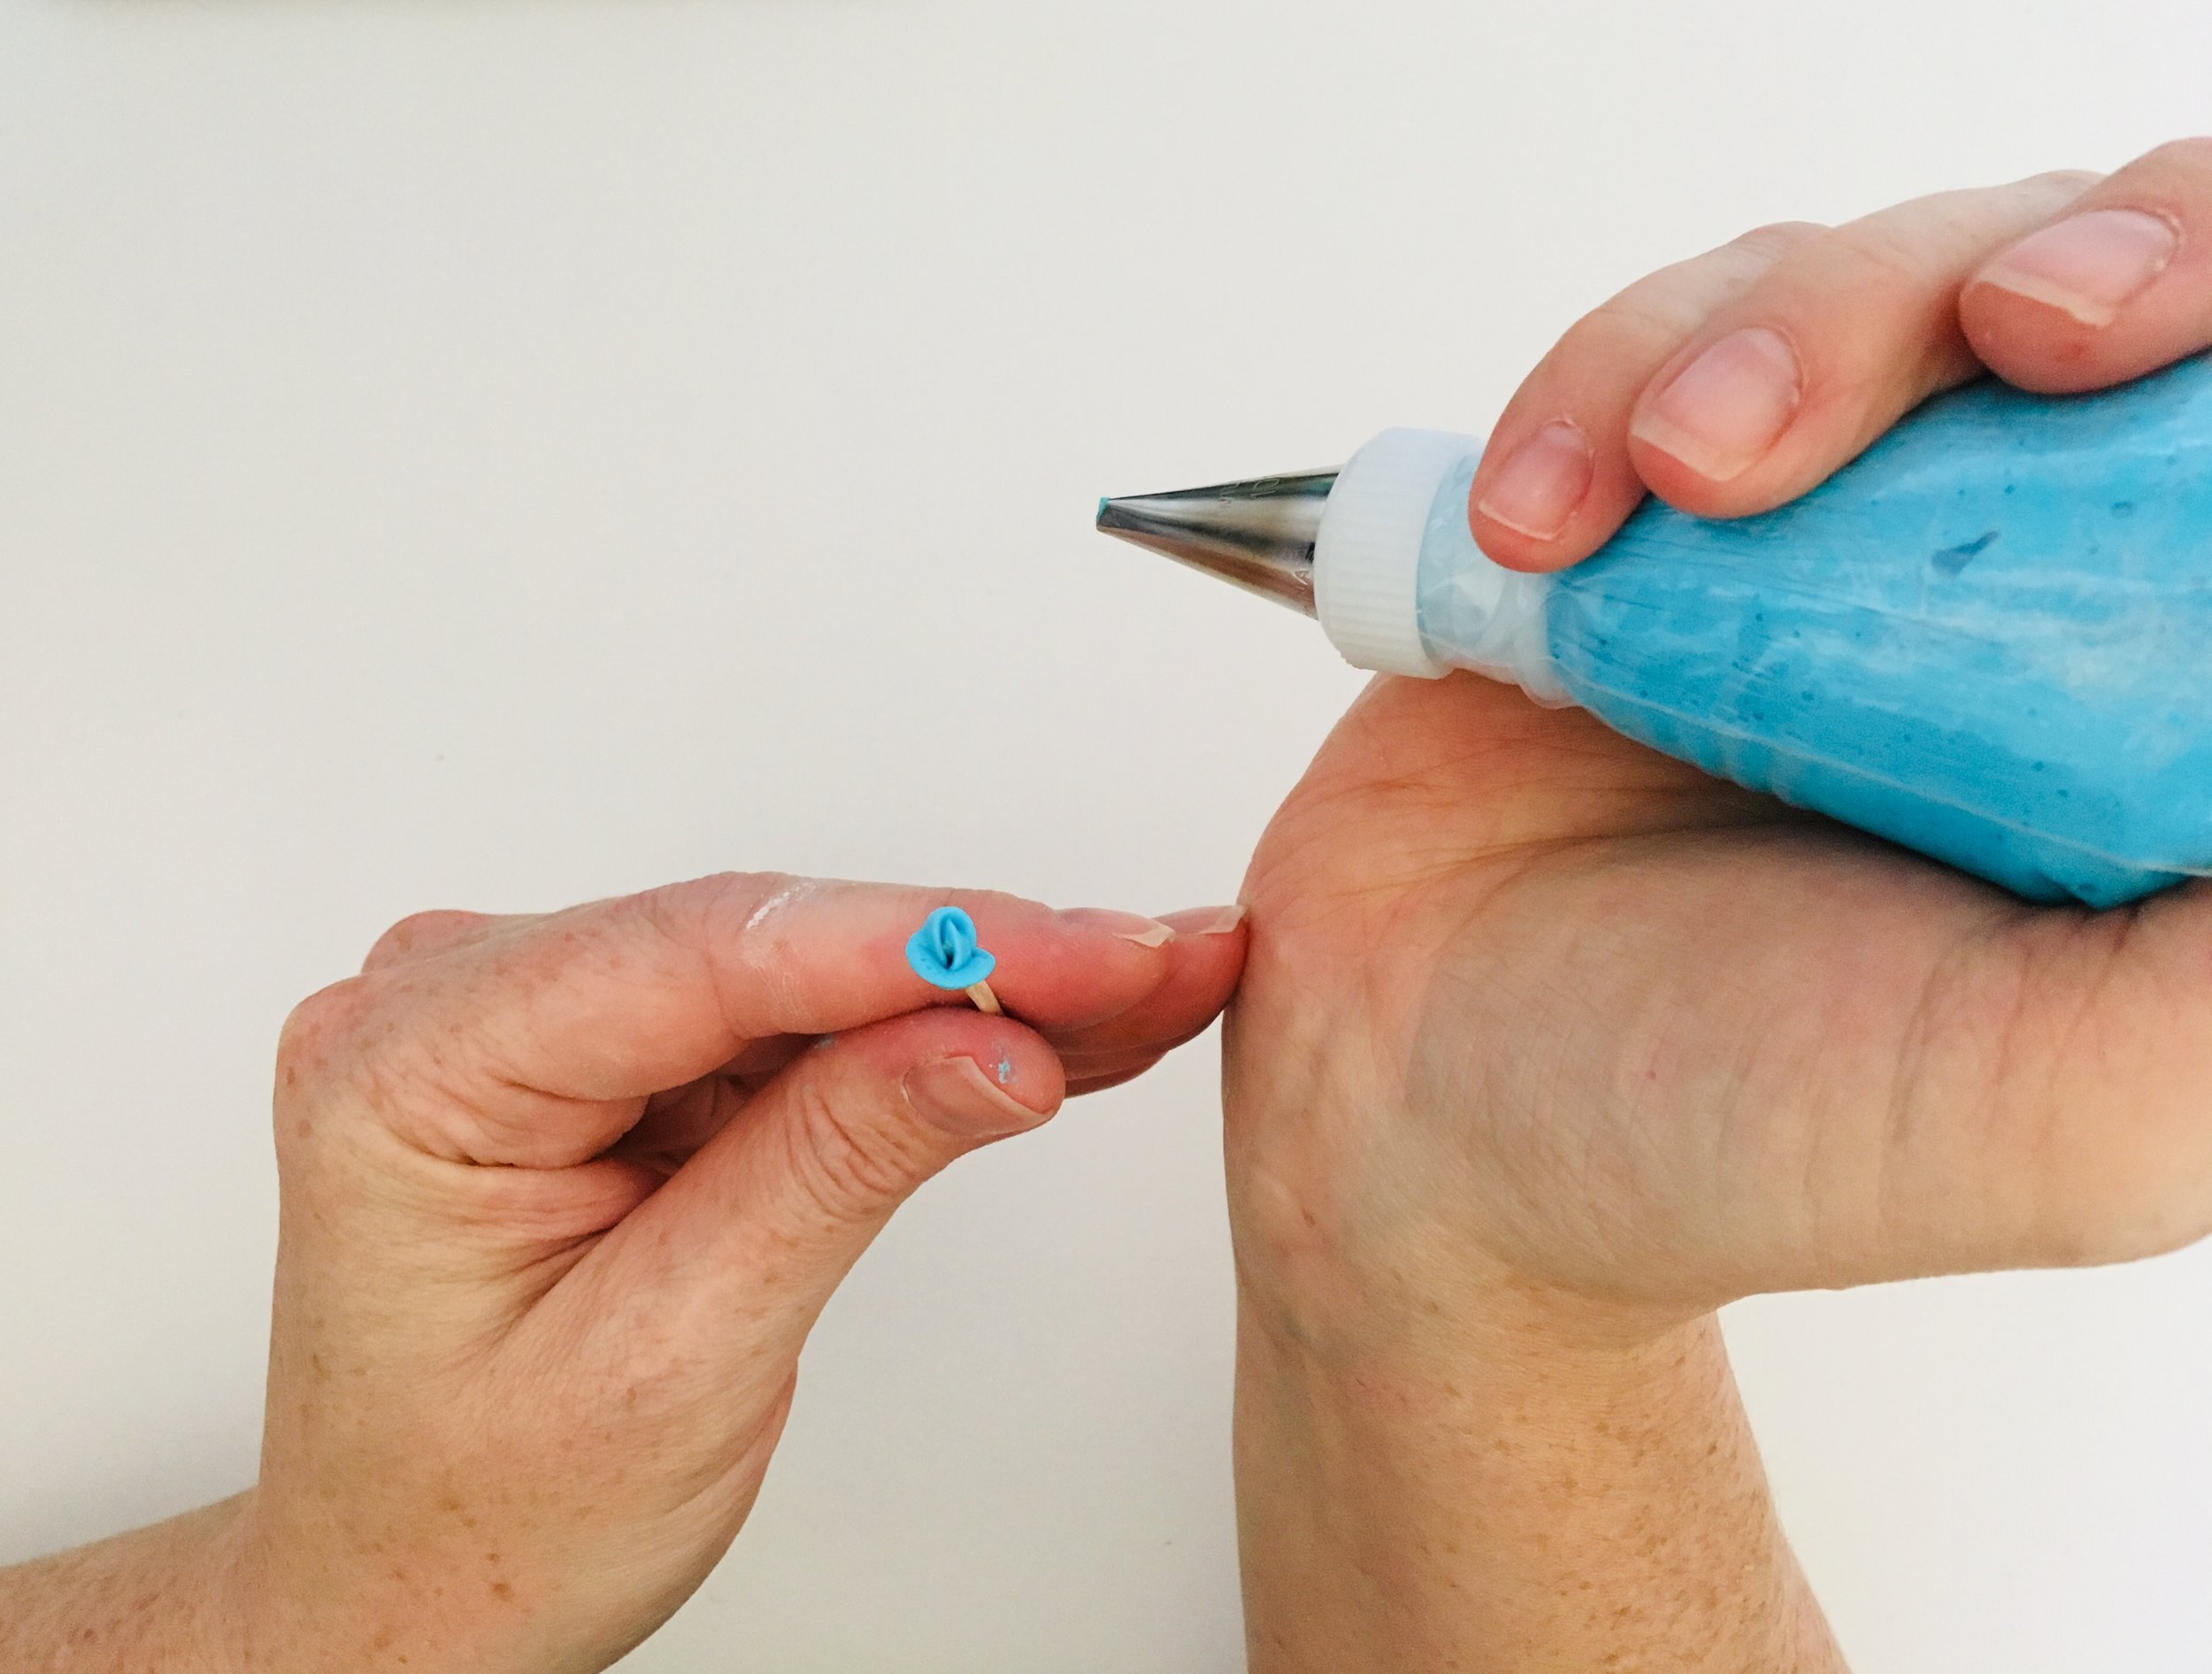
Step 1
Your hand positioning will make or break your roses. Keep in mind, there is more than one right way to do this but we will show you ours.
We should mention here that these instructions are written for right handed decorators. Lefty’s are going to have to reverse the hand hold here. The left hand is holding the toothpick and right hand is holding the piping bag. Position the piping bag in your hand so the pointed end of the petal tip is aiming up at the sky and the rounded end is at the bottom.
Slow and steady wins the race. It’s easier to keep yourself steady when your hands are connected so rest your fingers against your wrist.


Step 2
Get your frosting connected to the toothpick and pipe a rainbow - up one side of the toothpick, around the top and down the other side. (If you’re right handed) To make this easier, rotate the toothpick clockwise in your fingers just slightly as you form the rainbow.
Connect your frosting again to the exposed toothpick right in the center of your first rainbow. You’ll make another of the same rainbow loops going up and over the toothpick
Connect your frosting in the center of the second rainbow and do one last rainbow loop to form a cluster of three all together. We get it, your head is spinning right now. Know that there is a video at the end that puts all of these steps together in live action. We wanted to give some narrative to each part of the process because some of us are visual learners and some of us need step by step written instructions to follow. This is one of those things that is hard to put into words and is easier to just show- so bare with us.


STEP 3
Now that you have a cluster of three, you’re going to make 6 more “petals” around the cluster. Begin the first petal by connecting the frosting in the center of the last loop you created in step 2. Each petal connects and begins in the center of the previous petal so they overlap like a realistic rose. Did we mention this is hard to put into words? Sizing the petals might take a little practice but you’ve got it down if you can evenly space 6 of them around the outside and close the ring.
As you create each of the 6 petals remember -
keep your hands braced together the whole time. Free floating hands make messy roses
the hand holding the piping bag pretty much stays put
the hand holding the toothpick is going to slowly turning the toothpick in your fingers


Step 4
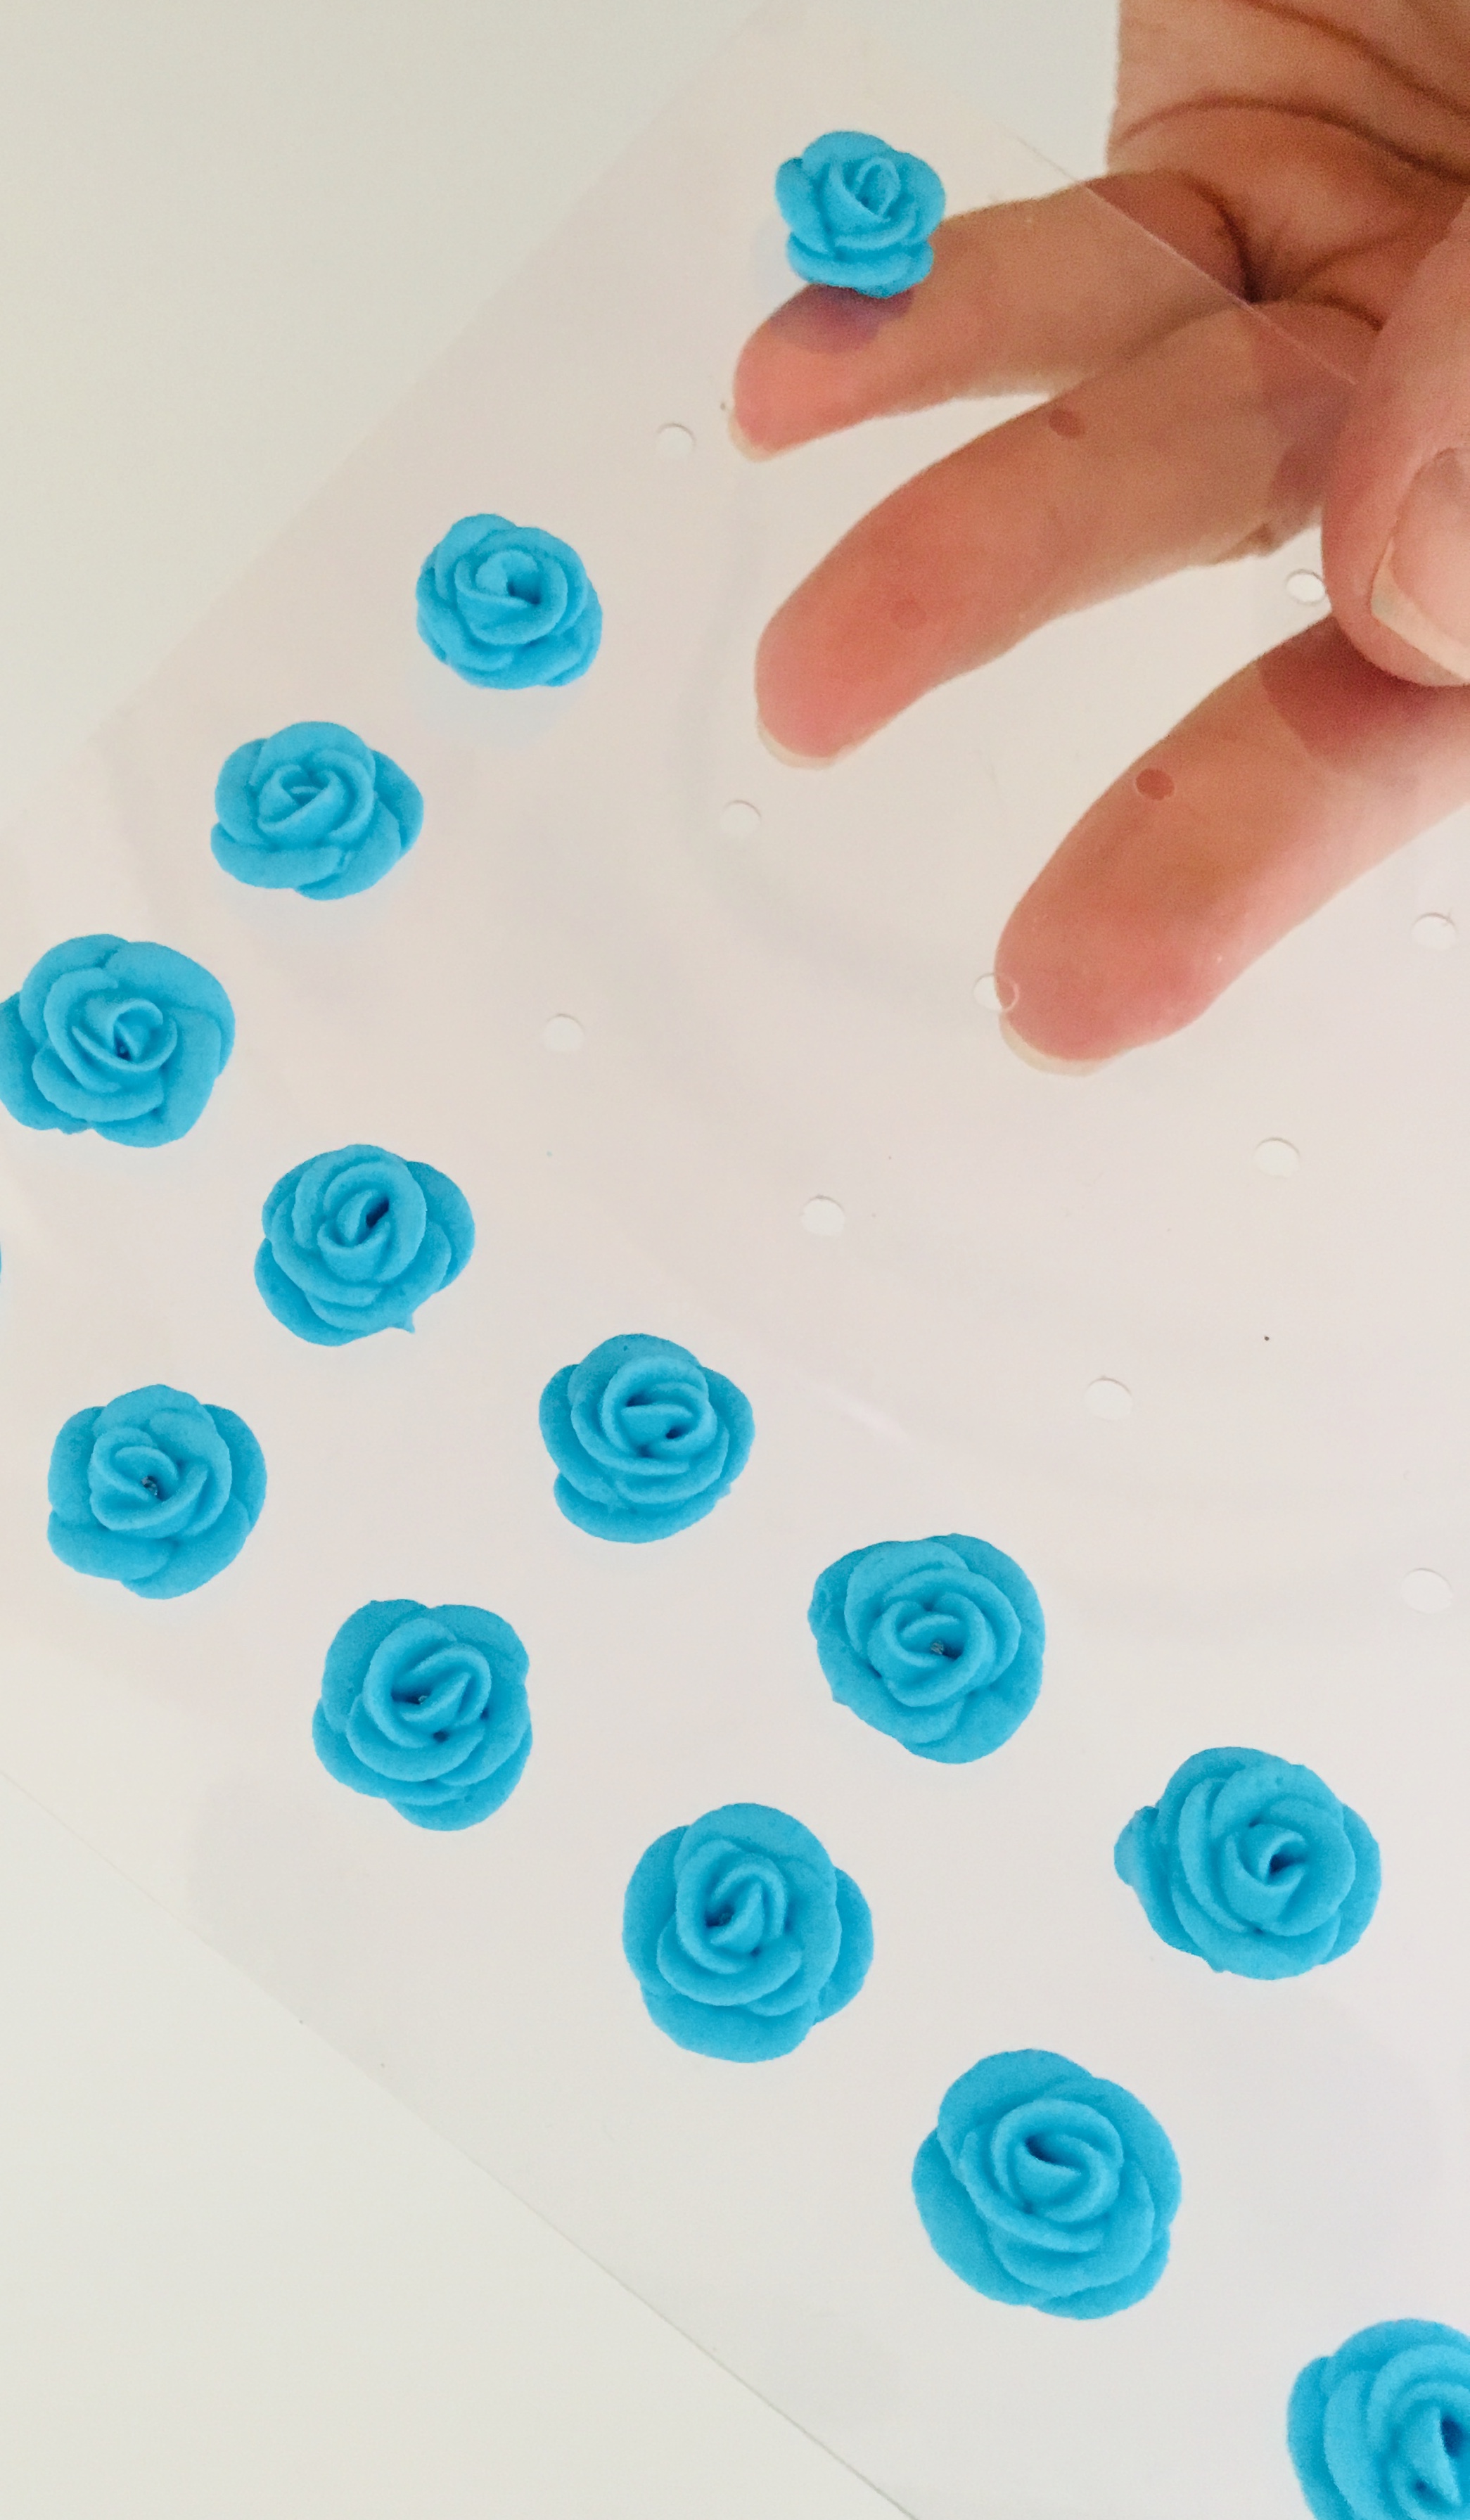
Next you’ll pull the rose off the toothpick so it can dry and so you can make another one! If you have the Blyss toothpick rose stencil, you’ll poke the toothpick down through one of the holes, grab it from underneath with the other hand and pull it through until the stencil pulls the rose off the top of the toothpick. If you’re using wax paper squares, you’ll do the same kind of thing. Poke the toothpick through the center of the wax paper, grab with the other hand and pull it through until the paper grabs the rose and pulls it off. Lay the wax paper with the rose down carefully on a cookie sheet and allow to dry completely. Drying usually takes 3-4 hours when the frosting is this stiff. Once the roses are dry, you can add some dimension and color to them by airbrushing the centers.
Find our toothpick stencil HERE
We told you earlier that we would explain why we love using the stencil for this step. There are actually several reason - so here are the highlights
You can dry several flowers in a very small area (36 roses on one 5.5” x 5.5” stencil to be exact)
You can set the roses on the stencil in front of a fan to speed up drying time without worrying about pieces of wax paper flying away with your roses attached.
They’re easy to pick up and move around when they’re all attached to the stencil
The stencil holds them all secure and close together if you choose to add airbrushing to them. If you try to airbrush roses drying on wax paper, the air from the gun tends to blow them around which makes them hard to aim at and it can damage them.
No prep time cutting squares of wax paper.
Less waste! The stencil can be washed and used over and over again.
Ready to put it all together? We made a video for you!


